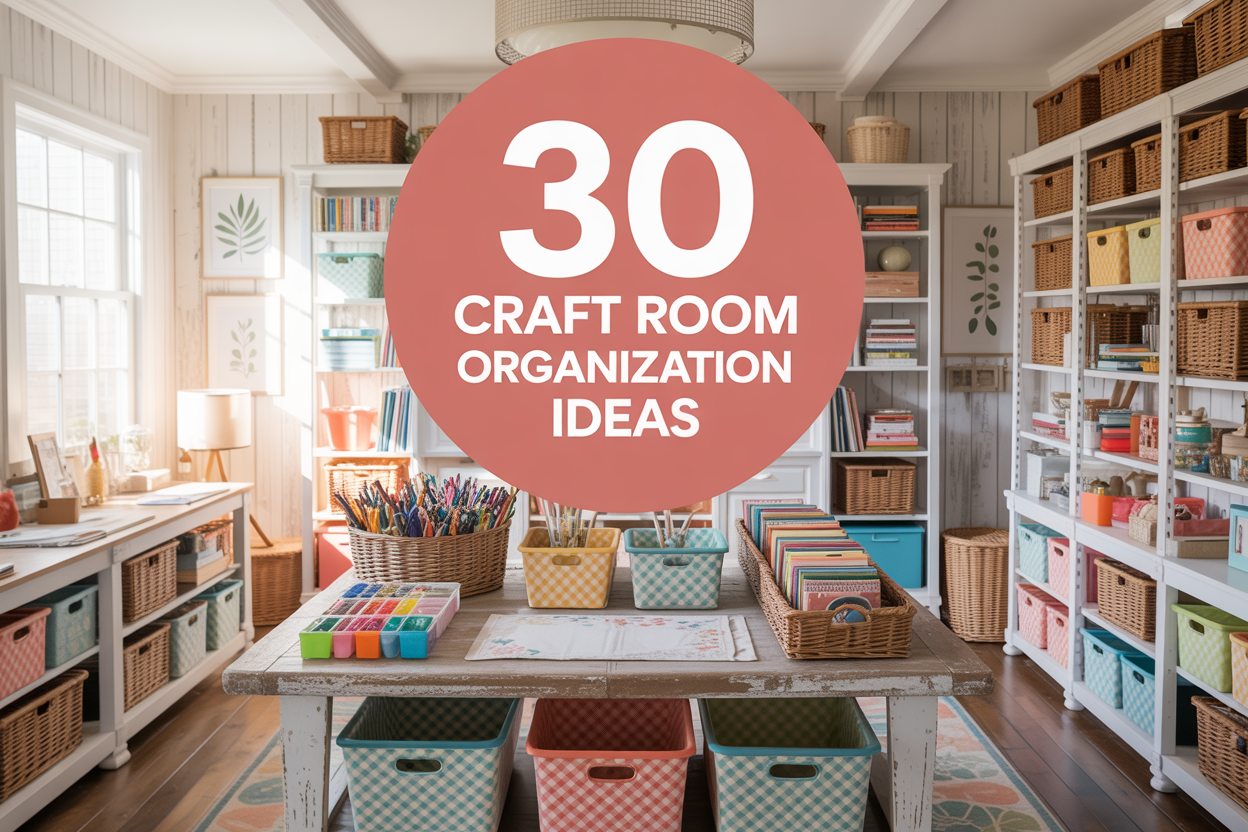
30 Creative Craft Room Organization Ideas to Maximize Your Space
Keeping your craft room organized is key to making the creative process enjoyable and efficient. In this guide, you’ll find various simple and clever ideas to help you tidy up your space and keep all your supplies at your fingertips. From storage solutions to clever hacks, let’s boost your workspace into a tidy haven for your artistic endeavors!
Post may contain affiliate links
PIN TO YOUR BOARDS ON CRAFT ROOM ORGANIZATION
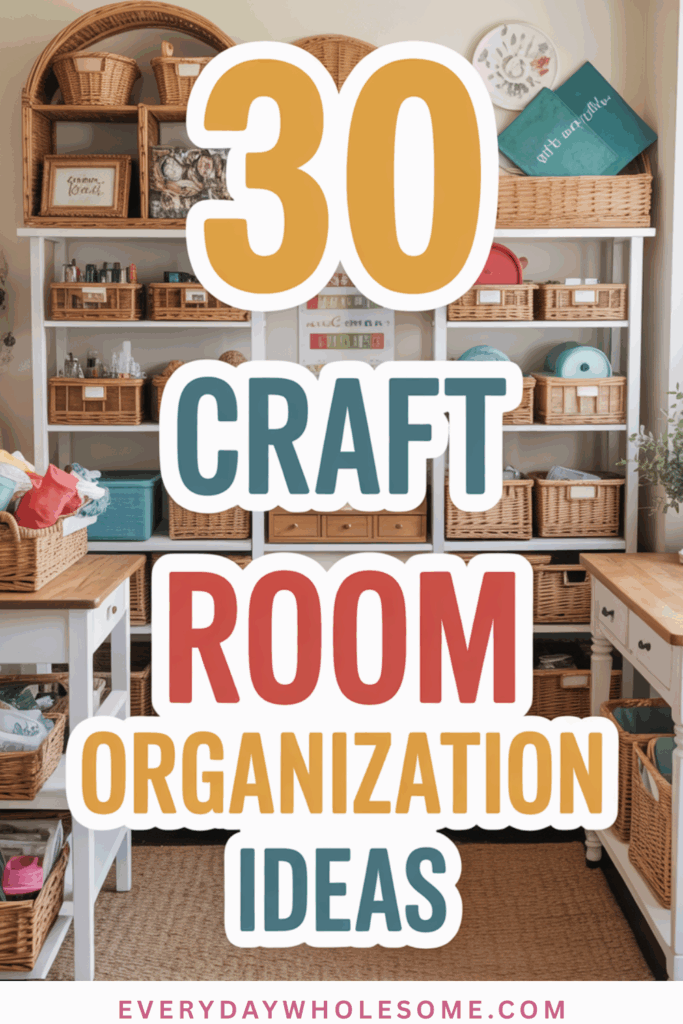
CRAFT ROOMS FOR INSPIRATION

Labeling Everything for Easy Access
Keeping your craft room organized can be a breeze with the right labeling system. The image shows a well-arranged shelving unit filled with clear bins and labeled containers. Each bin has a clear label, making it easy to find what you need without digging through piles of supplies.
Using labels helps you quickly identify where everything is stored. Whether it’s paper, tools, or embellishments, having a designated spot for each item saves time and reduces frustration. You can even color-code your labels for a fun touch!
Consider using a label maker or simple adhesive labels. Write down the contents clearly so anyone can find items easily. This way, you can keep your creative space tidy and functional, allowing you to focus on your projects instead of searching for supplies.
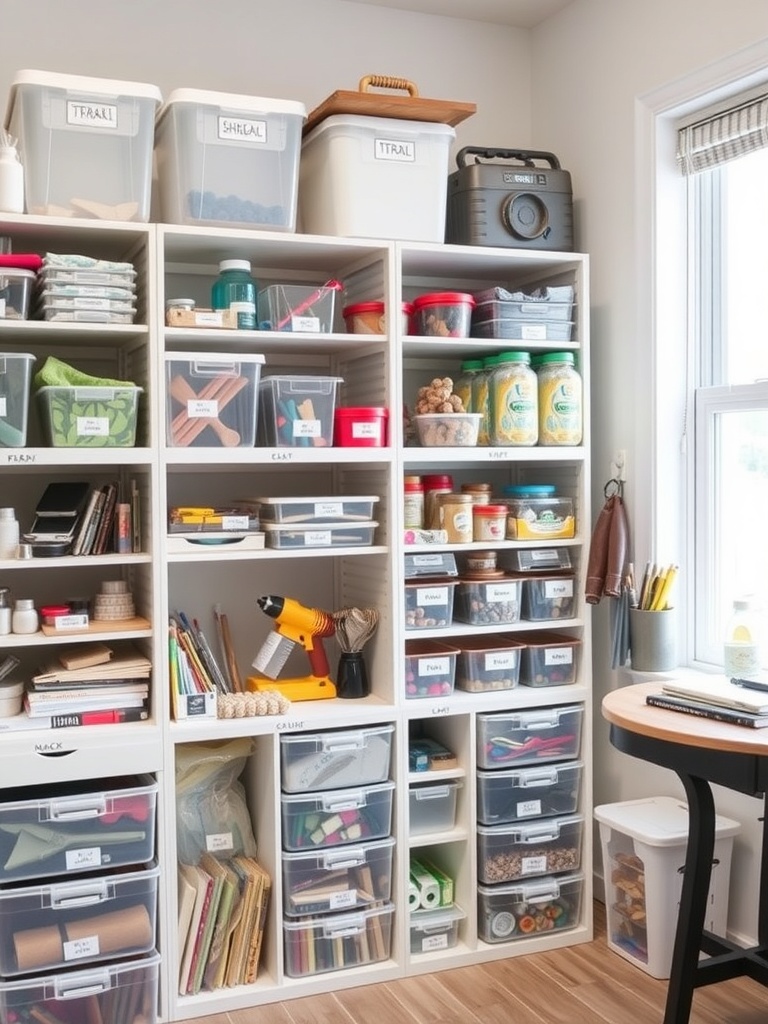
Clear Storage Containers for Visibility
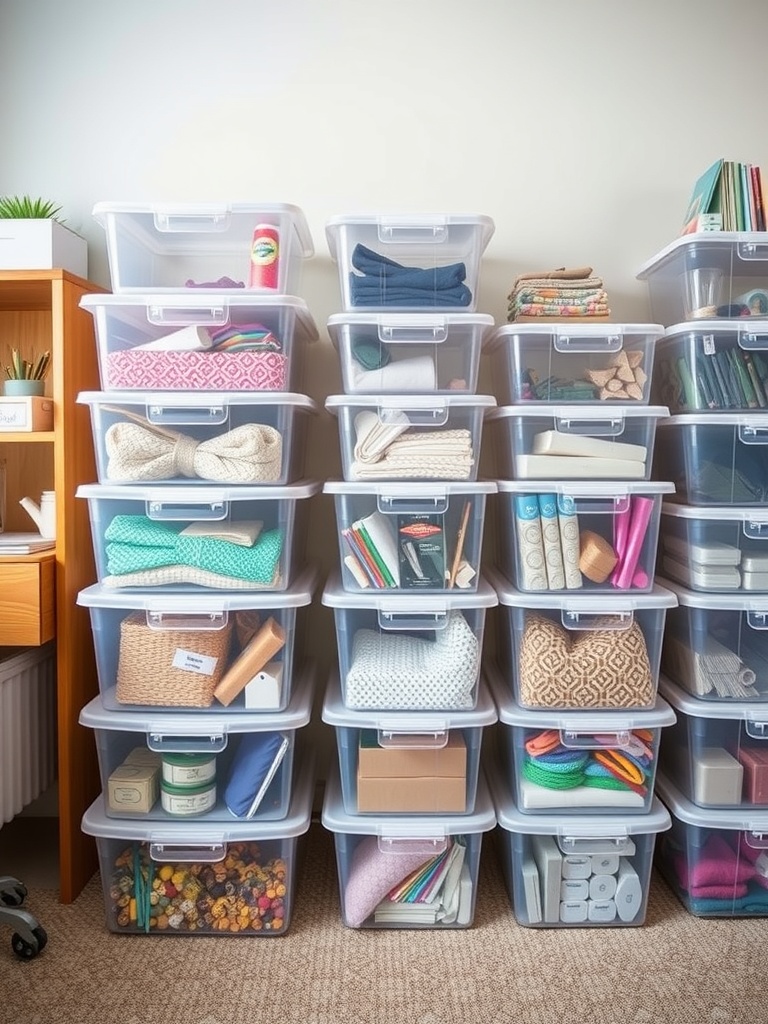
Clear storage containers are a fantastic way to keep your craft room organized. They let you see everything at a glance, making it easy to find what you need without rummaging through piles of supplies.
In the image, you can see a well-arranged setup of clear bins stacked neatly. Each container holds different materials, from colorful fabrics to various crafting tools. This setup not only looks tidy but also maximizes space.
Using clear containers helps you keep track of your supplies. You can quickly spot what you have and what you might need to restock. Labeling each bin can further enhance this system, ensuring everything has its place.
Consider grouping similar items together. For example, keep all your yarn in one bin and your paper supplies in another. This way, you can easily grab what you need for your next project without any hassle.
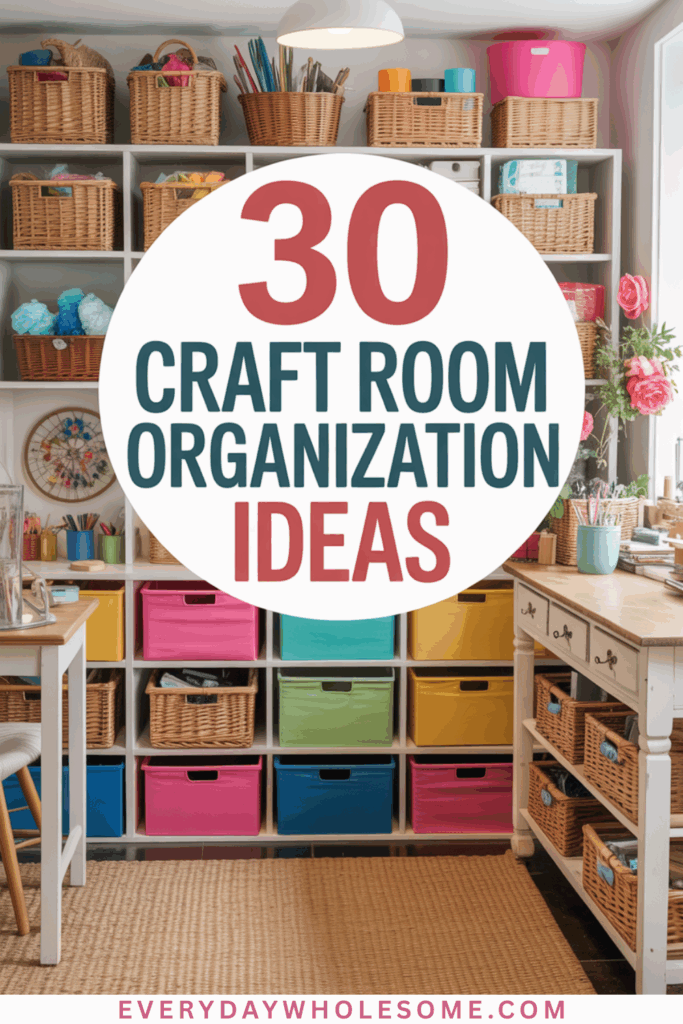
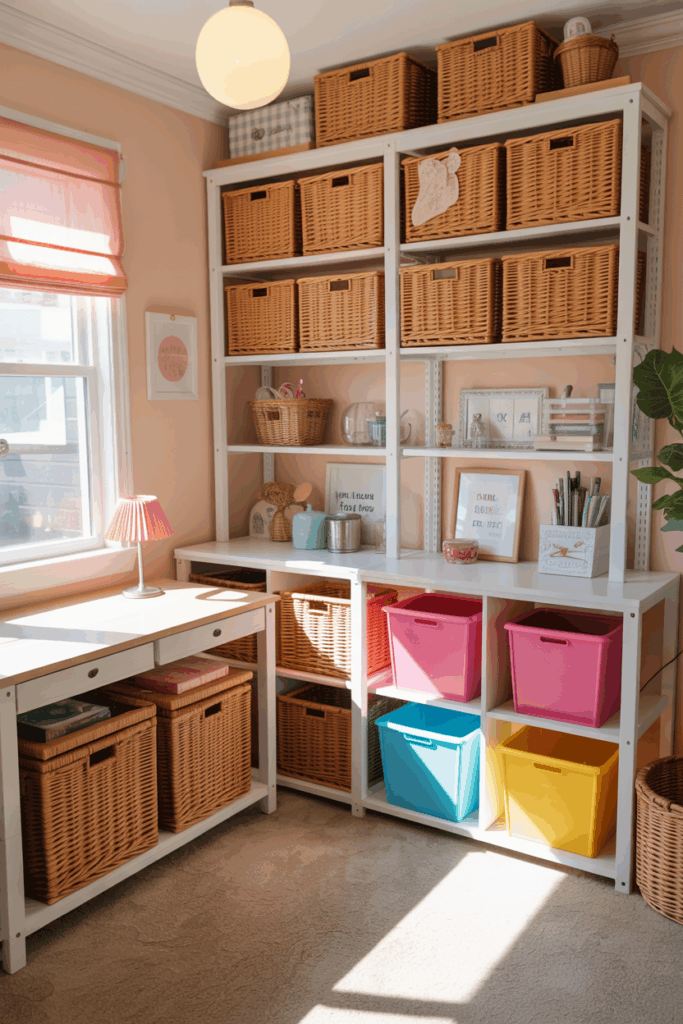
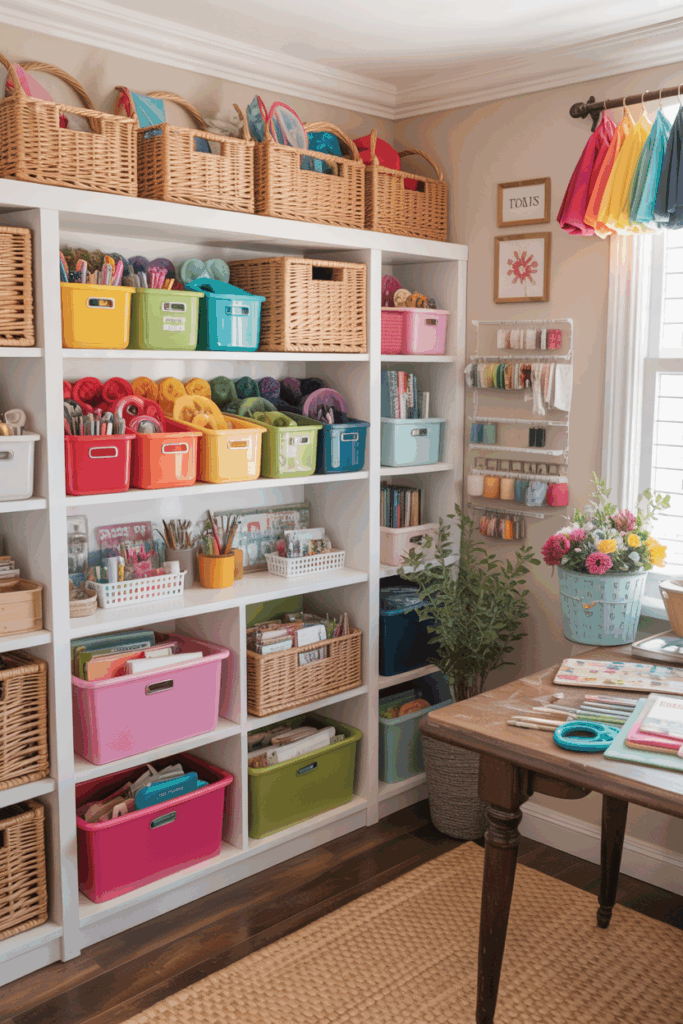
Color-Coded Storage Bins
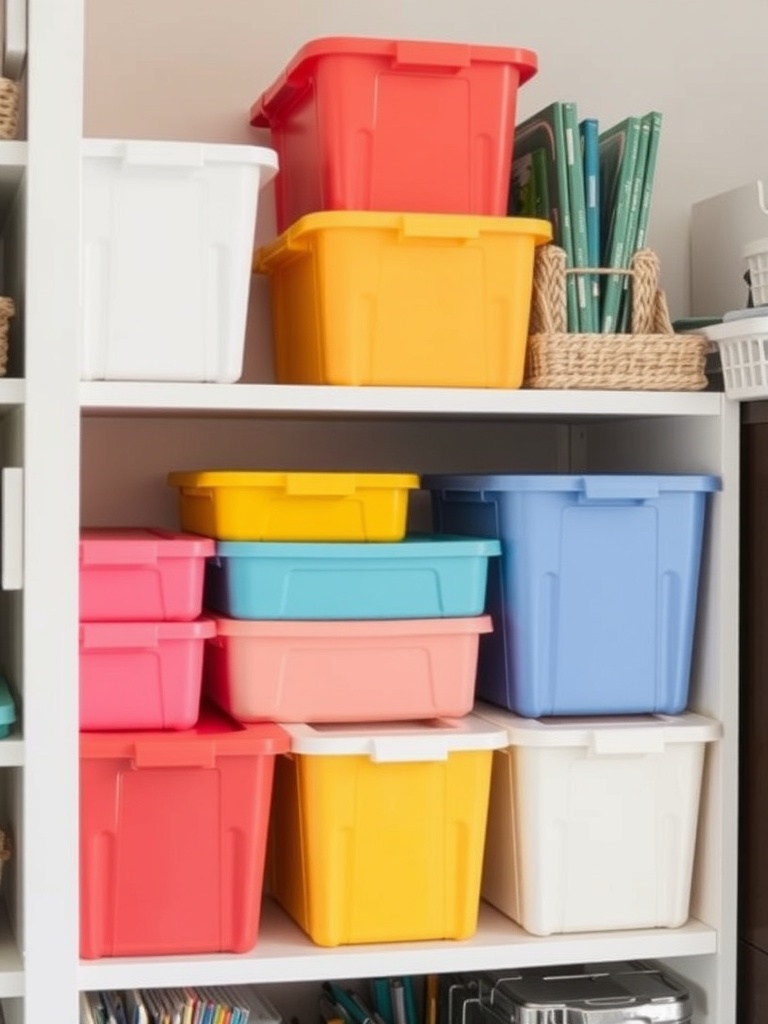
Color-coded storage bins are a fun and effective way to organize your craft room. The vibrant hues make it easy to find what you need at a glance. Each color can represent a specific type of material or project, helping you keep everything in its place.
In the image, you can see a variety of bins stacked neatly on a shelf. The bright colors like red, yellow, and blue not only add a cheerful touch to the room but also serve a practical purpose. This system reduces clutter and makes it simple to locate supplies quickly.
Using bins of different sizes can also help accommodate various items. Larger bins can hold bulkier materials, while smaller ones are perfect for tiny embellishments. This way, you can maximize your storage space while keeping everything organized.
Labeling each bin can enhance this system even more. You can use stickers or tags to indicate what’s inside each container. This small step can save you time and frustration when you’re in the middle of a project.
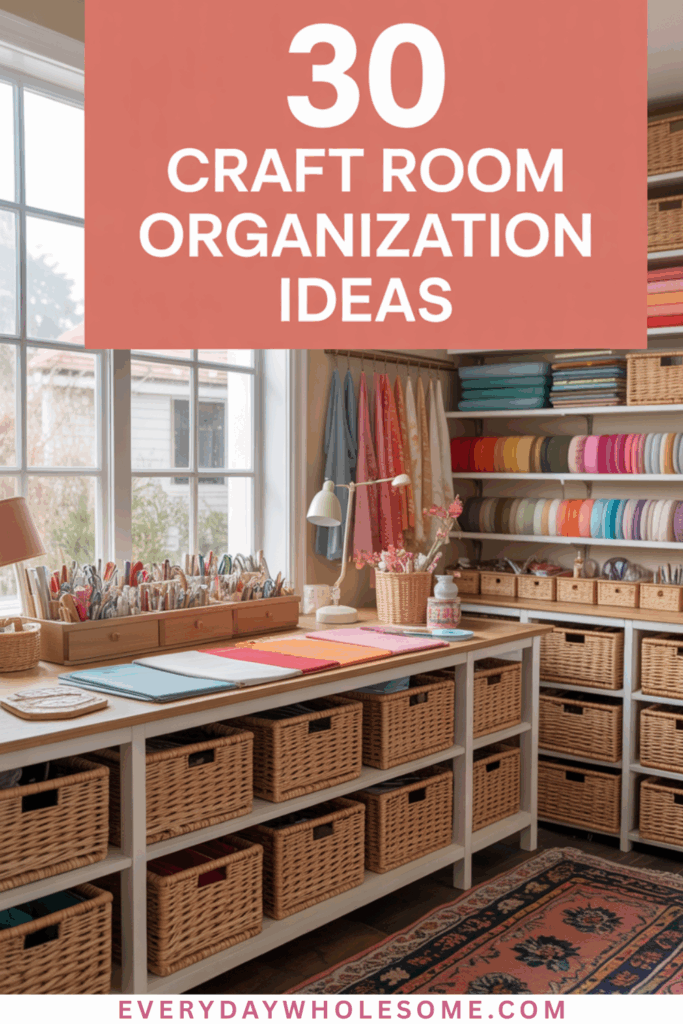
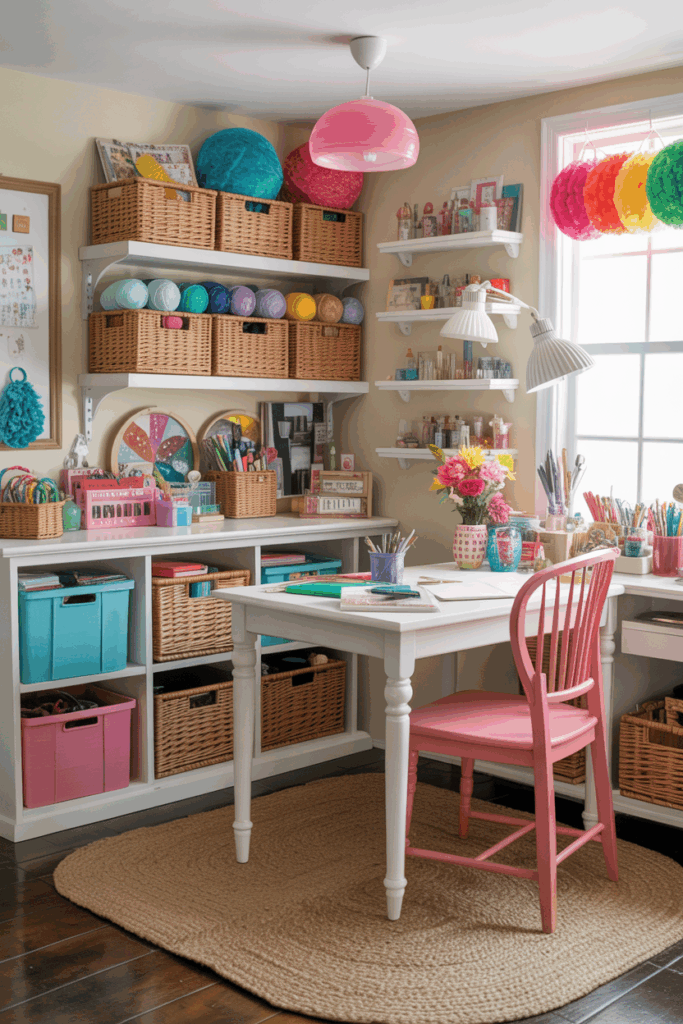
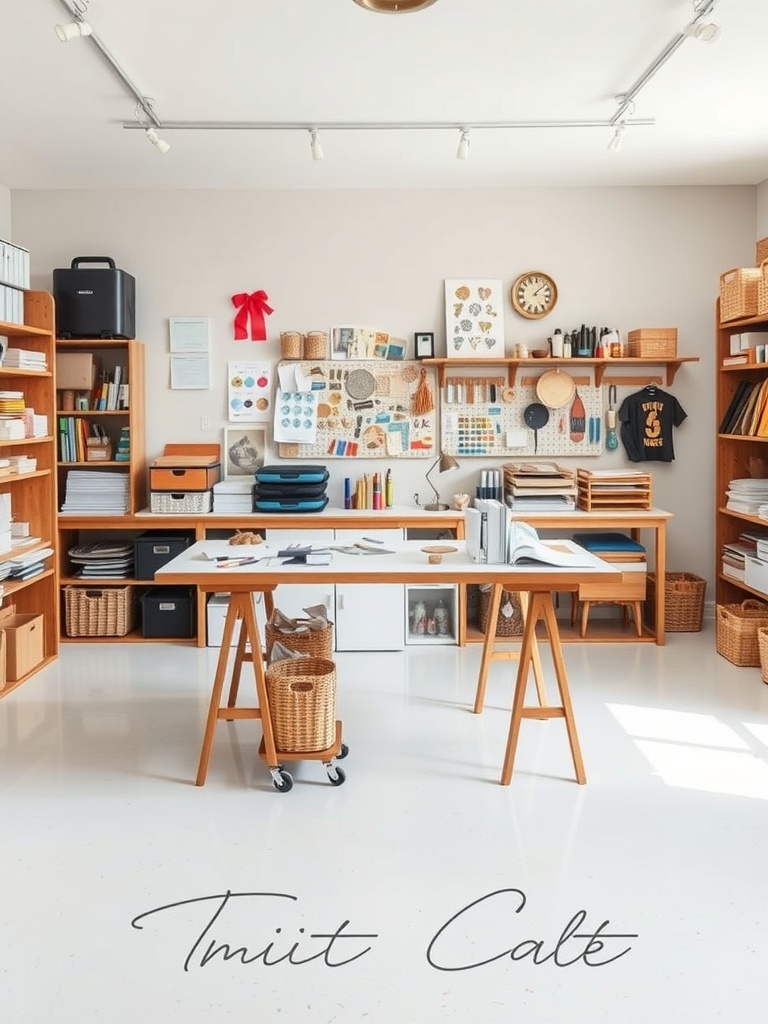
Dedicated Zones for Different Crafts
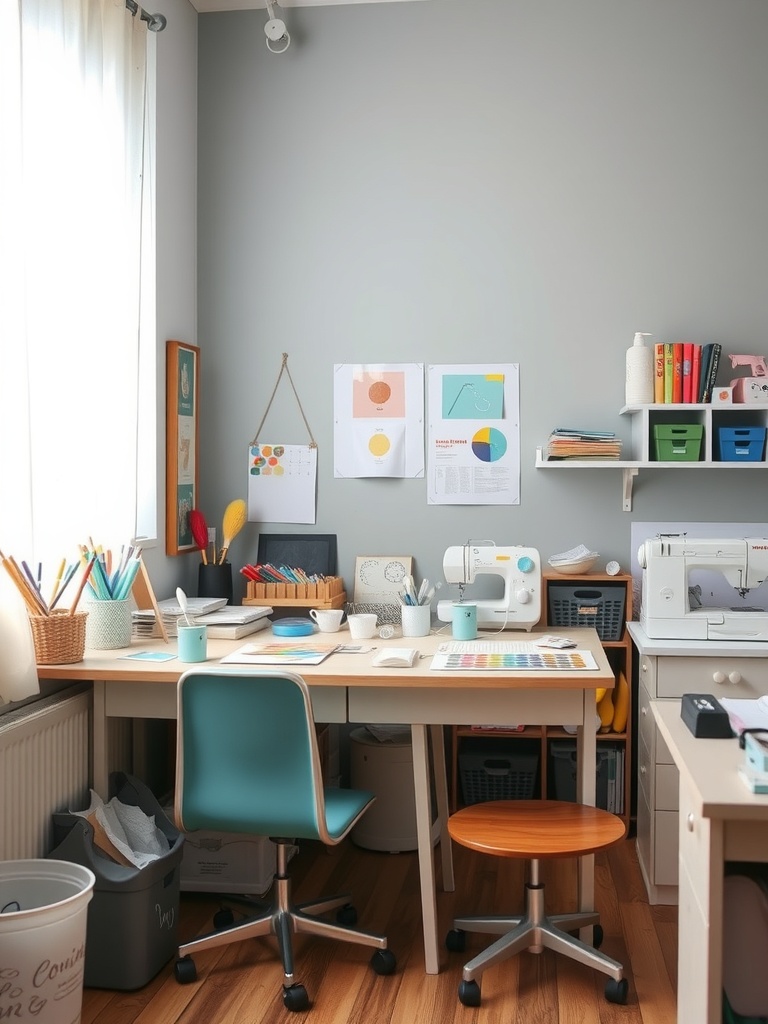
Creating dedicated zones for different crafts can make your space more functional and enjoyable. In the image, you can see a well-organized craft room that separates various activities. This setup helps keep everything in its place, making it easier to find what you need.
The desk area is perfect for drawing or painting, with plenty of supplies like colored pencils and paper within reach. Nearby, a sewing machine is ready for fabric projects, showing how each zone serves a specific purpose. This kind of organization minimizes clutter and maximizes creativity.
Storage solutions, like baskets and shelves, are visible in the image. They help keep materials sorted and accessible. You can easily grab what you need without rummaging through piles of supplies. This thoughtful arrangement encourages you to dive into your projects without distraction.
Overall, having dedicated zones not only enhances your workflow but also makes your craft room a pleasant place to spend time. So, think about how you can create your own zones to suit your crafting needs!
Pegboard for Tools and Supplies
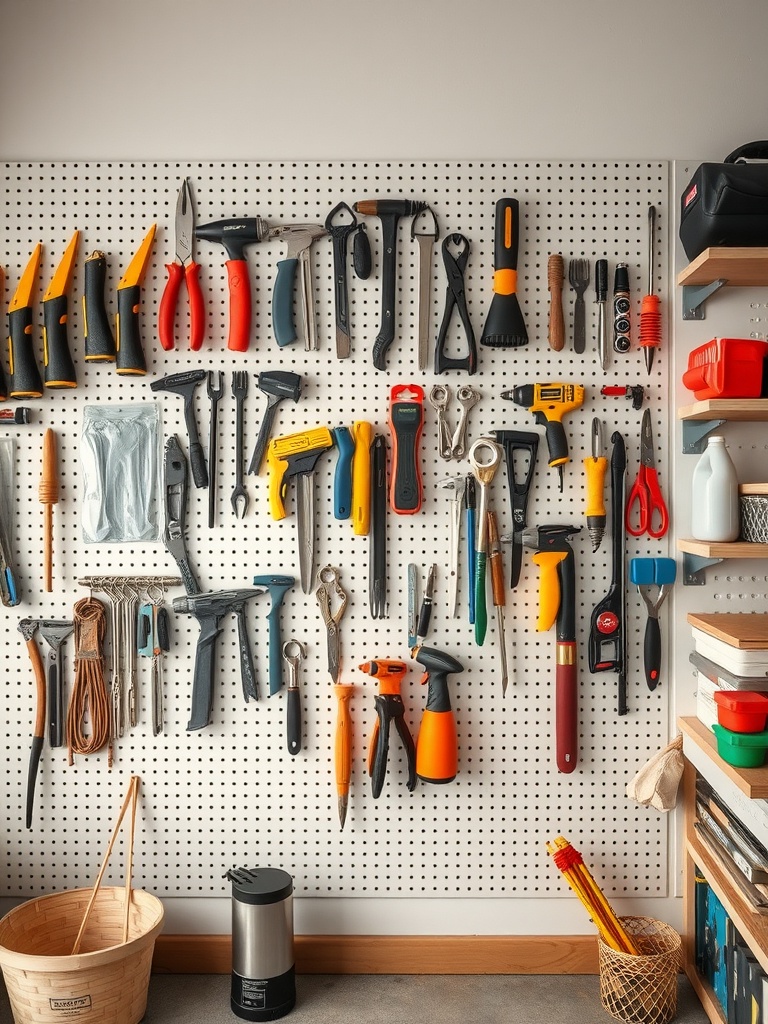
Using a pegboard is a smart way to keep your tools and supplies organized in your craft room. The image shows a well-arranged pegboard filled with various tools, making it easy to see everything at a glance. This setup not only saves space but also adds a touch of creativity to your workspace.
Each tool has its designated spot, which helps prevent clutter. You can easily grab what you need without rummaging through drawers. The bright colors of the tools also make the pegboard visually appealing, turning your organization system into a part of your room’s decor.
To create your own pegboard, start by choosing a wall space that’s easily accessible. Hang the pegboard securely and use hooks to hold your tools. You can even add small bins for smaller supplies. This way, everything is within reach, and your craft room stays tidy and functional.
Rotating Craft Supply Carts
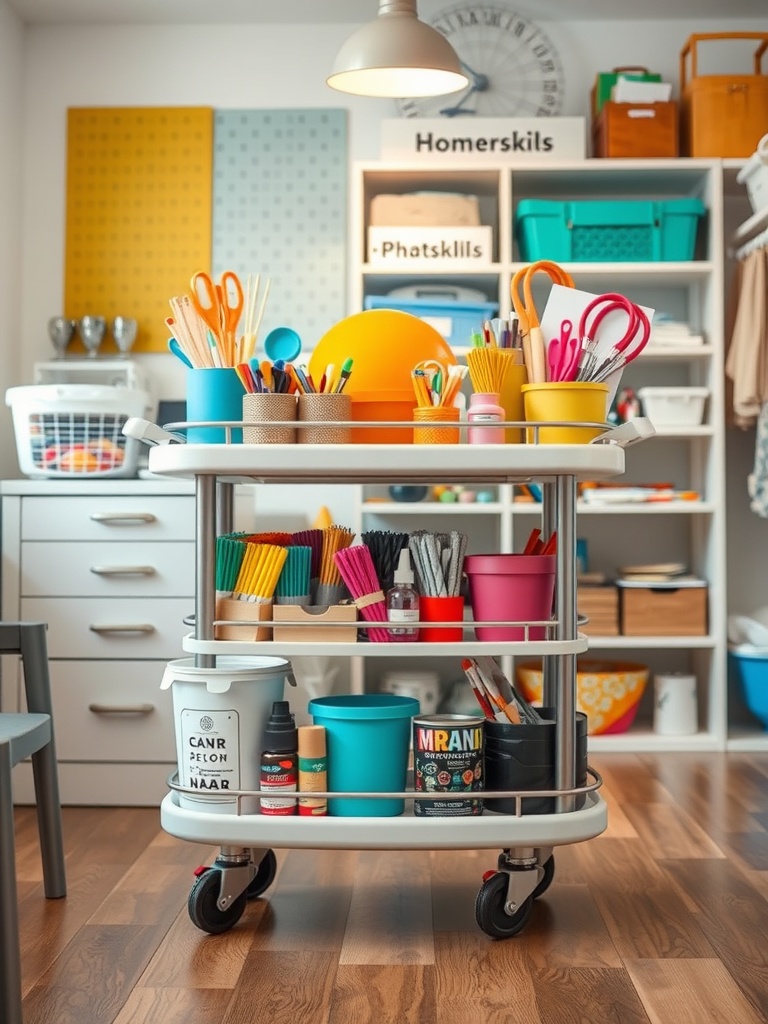
Rotating craft supply carts are a fantastic way to keep your workspace organized and efficient. These carts offer easy access to all your supplies while saving space. The image shows a well-stocked cart filled with colorful tools, markers, and containers, making it a vibrant addition to any craft room.
Having a dedicated cart allows you to move your supplies wherever you need them. You can roll it to your desk, the dining table, or even outside for some fresh air while you work. The variety of colors and containers adds a fun touch, making your crafting experience even more enjoyable.
Using a rotating cart also encourages you to keep things tidy. With everything in one place, it’s easier to see what you have and what you need. Plus, it can help you stay inspired as you look at all your supplies ready for use!
Drawer Organizers for Small Items
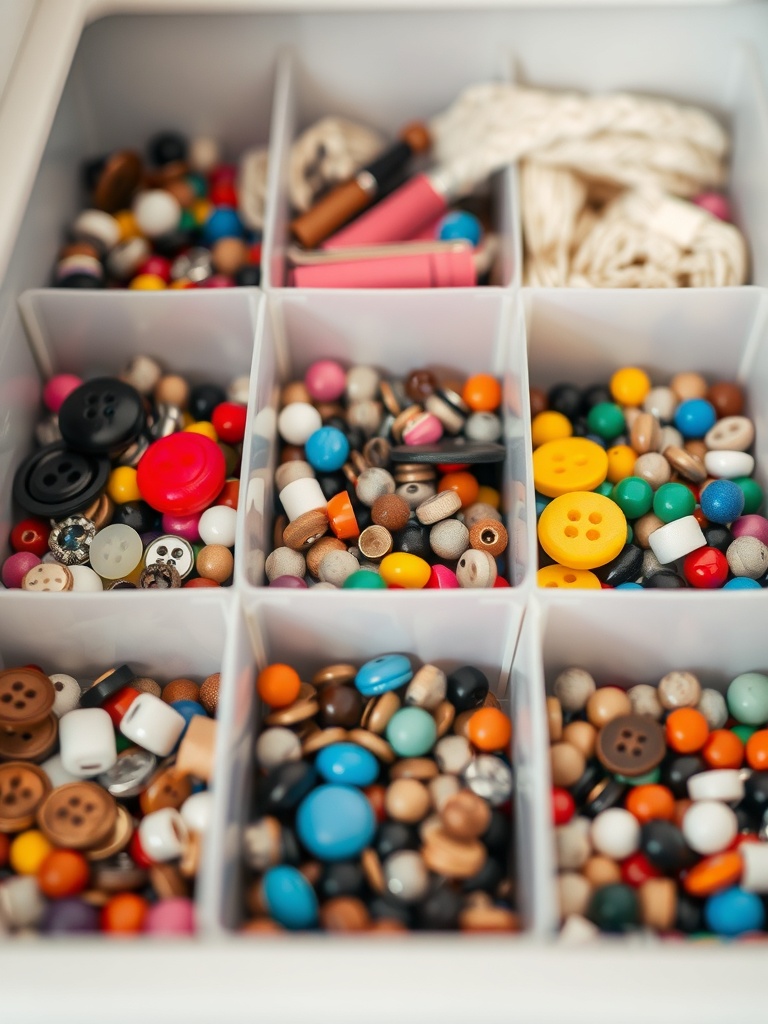
Keeping small items organized can be a challenge, but drawer organizers make it easy and fun. The image shows a neatly arranged drawer filled with colorful buttons, beads, and other small supplies. Each item has its own space, making it simple to find what you need.
Using dividers in your drawers helps separate different types of items. In this case, you can see a variety of buttons and beads sorted by color and size. This not only saves time when searching for materials but also adds a pop of color to your workspace.
Consider using clear containers or bins to keep everything visible. This way, you can quickly spot the items you want without digging through a messy drawer. Plus, it adds a touch of charm to your craft room.
Don’t forget to label your sections! Labels help you remember where everything goes, making it easier to maintain organization over time. With a little effort, your small items can be tidy and accessible, allowing your creativity to flow.
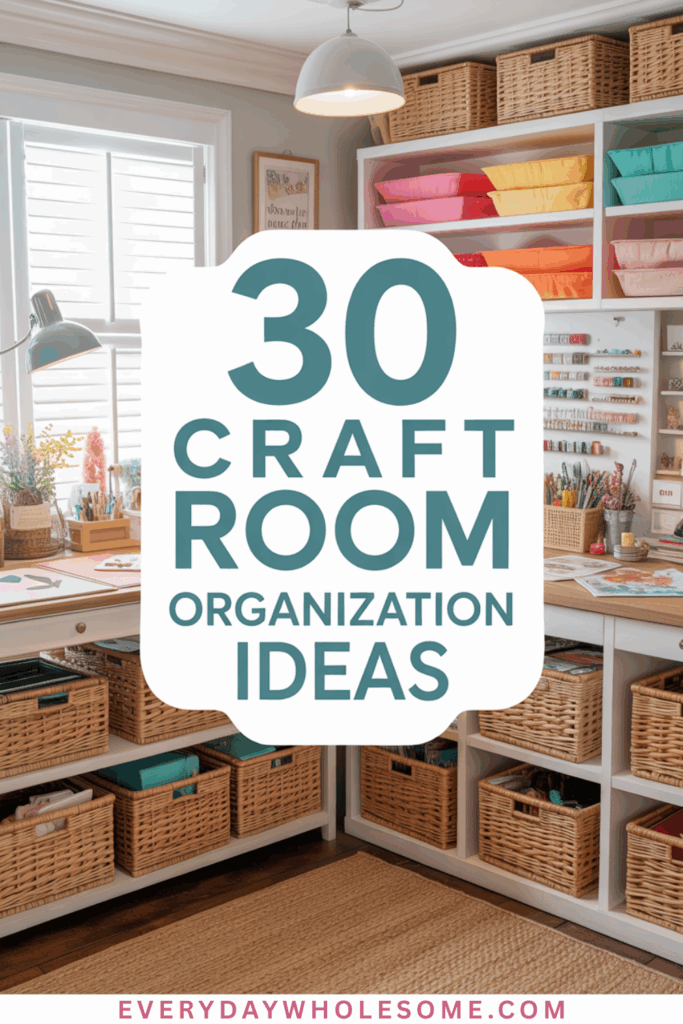
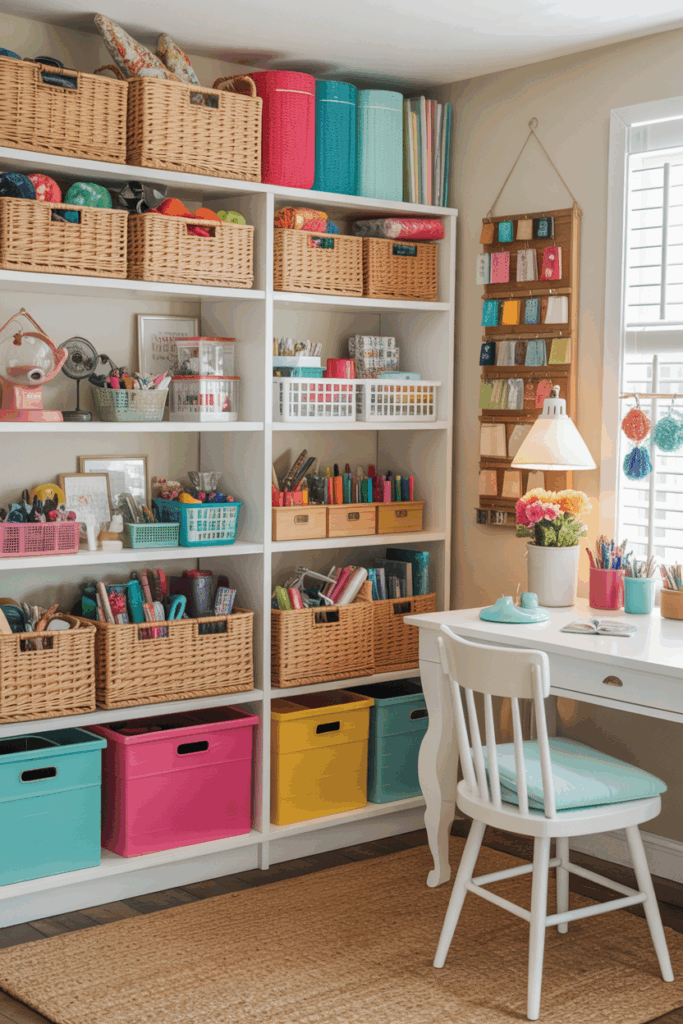
Utilizing Vertical Space with Shelves
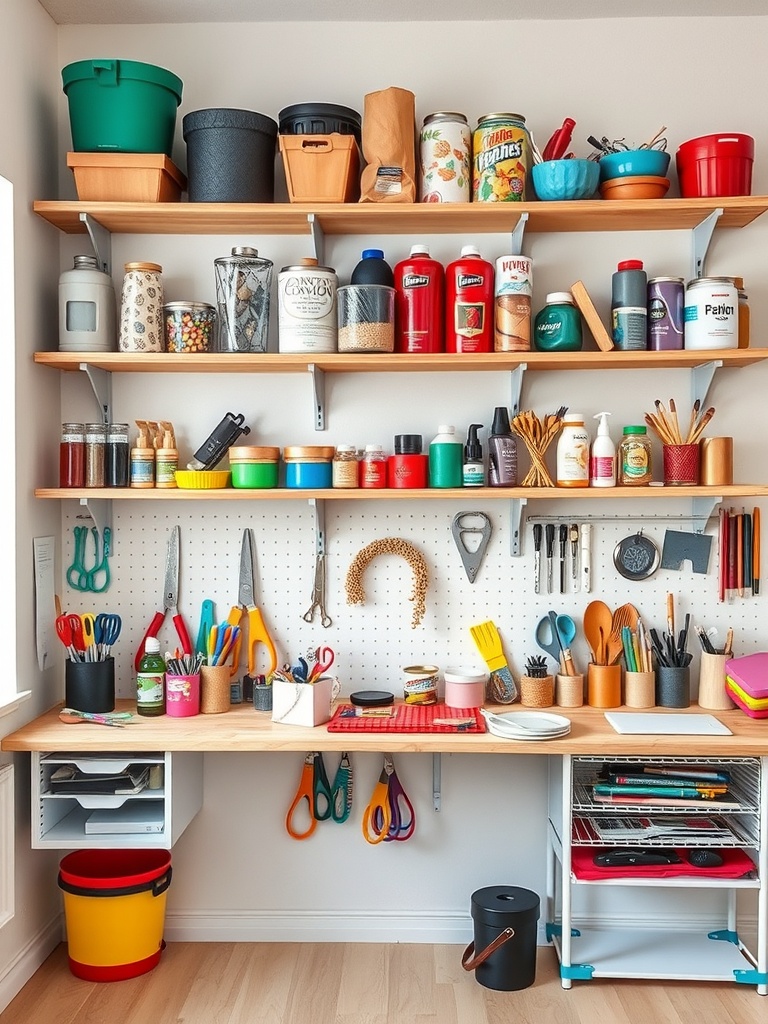
When it comes to organizing your craft room, vertical space is your best friend. The image shows a well-organized shelving unit that maximizes every inch of wall space. By using shelves, you can keep your supplies visible and easily accessible.
The shelves are filled with various containers and tools, making it easy to find what you need. Colorful bins and jars not only store items but also add a fun pop of color to the room. This makes the space feel inviting and encourages creativity.
Notice how the lower shelves hold frequently used items, while the upper shelves are perfect for less-used supplies. This arrangement helps keep the workspace clear and clutter-free. Pegboards can also be a great addition, allowing you to hang tools and keep them organized.
Incorporating vertical storage solutions like these shelves can transform your craft room. It creates a functional space that inspires you to create. So, grab some shelves and start organizing!
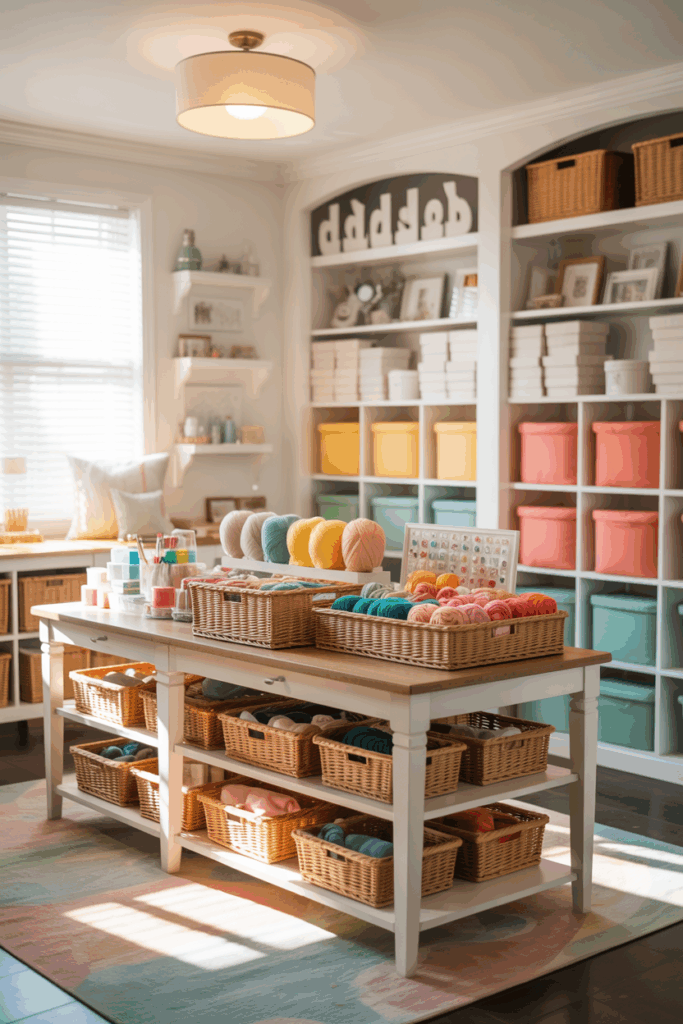
Hanging Baskets for Yarn Storage
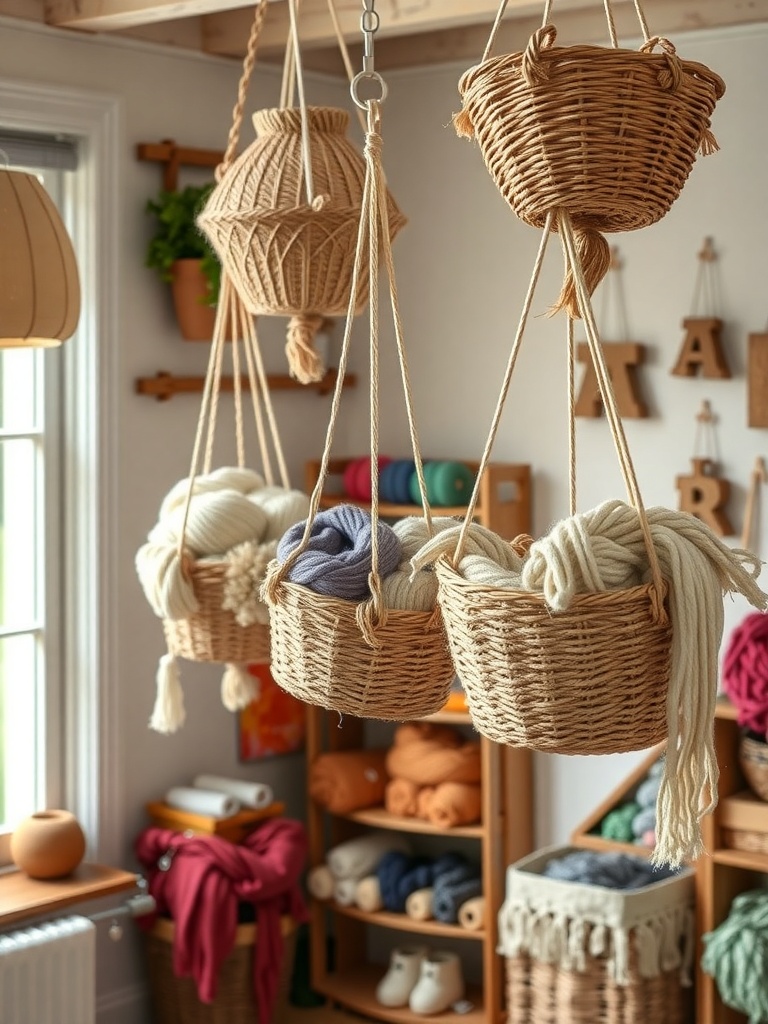
Hanging baskets are a stylish and practical solution for yarn storage. They keep your yarn organized and easily accessible while adding a decorative touch to your craft room.
In the image, you can see several woven baskets suspended from the ceiling. Each basket holds a different color of yarn, making it easy to find what you need. This setup not only saves space but also keeps the yarn visible, so you can quickly grab what you want without rummaging through drawers.
Using hanging baskets helps to declutter your workspace. You can hang them at different heights for a fun, dynamic look. Plus, they free up shelf space for other supplies. Consider using baskets made from natural materials for a cozy, inviting feel.
Overall, this method of storage is both functional and aesthetically pleasing. It’s a great way to showcase your yarn collection while keeping everything tidy.
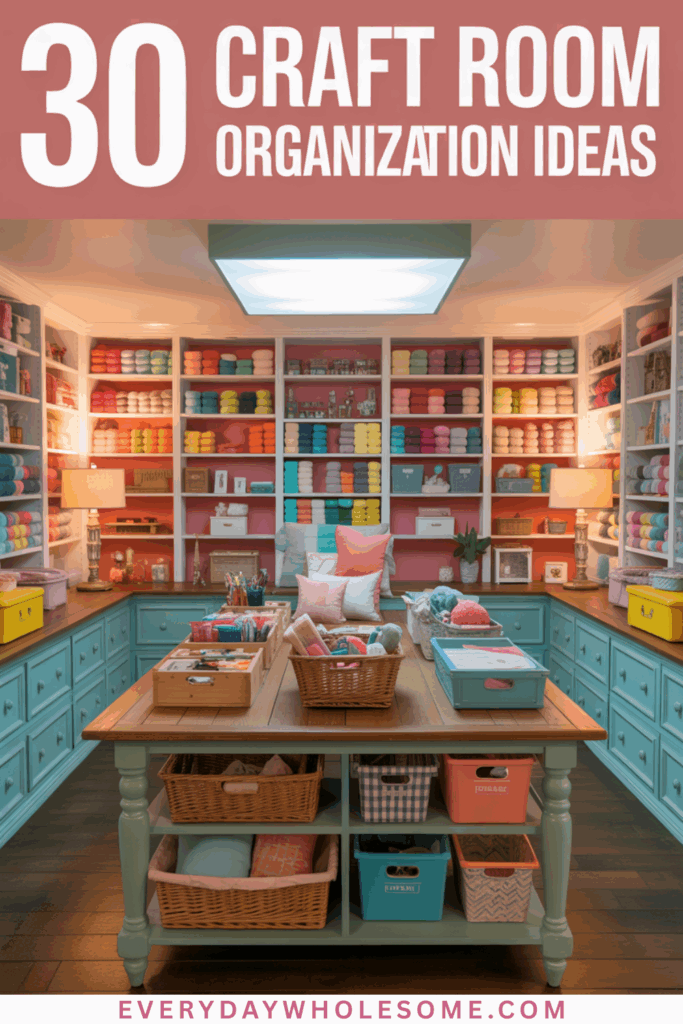
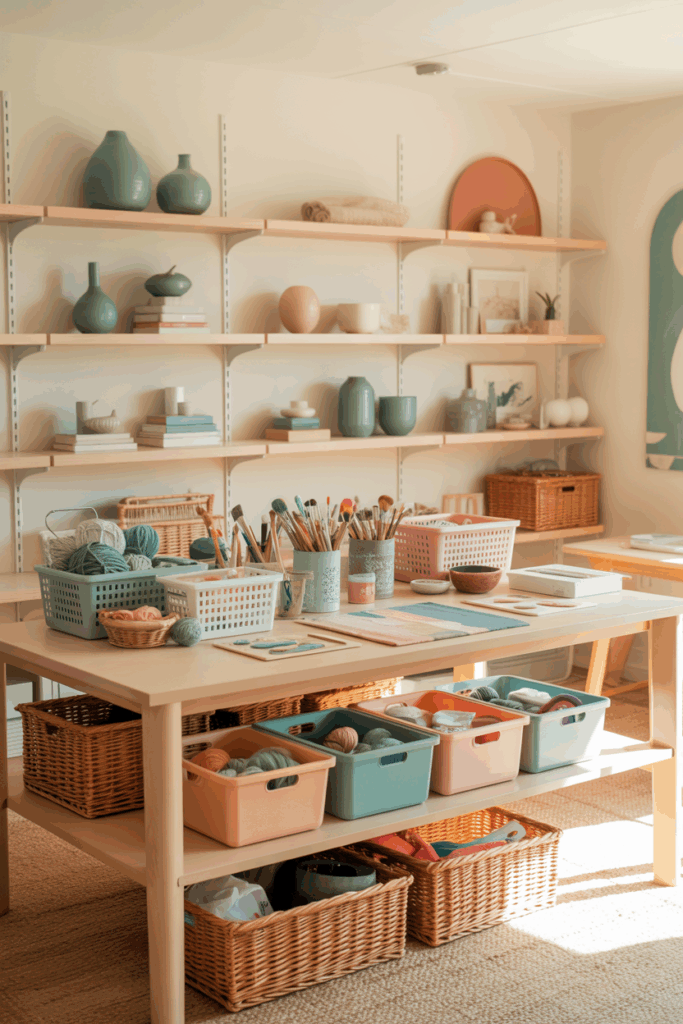
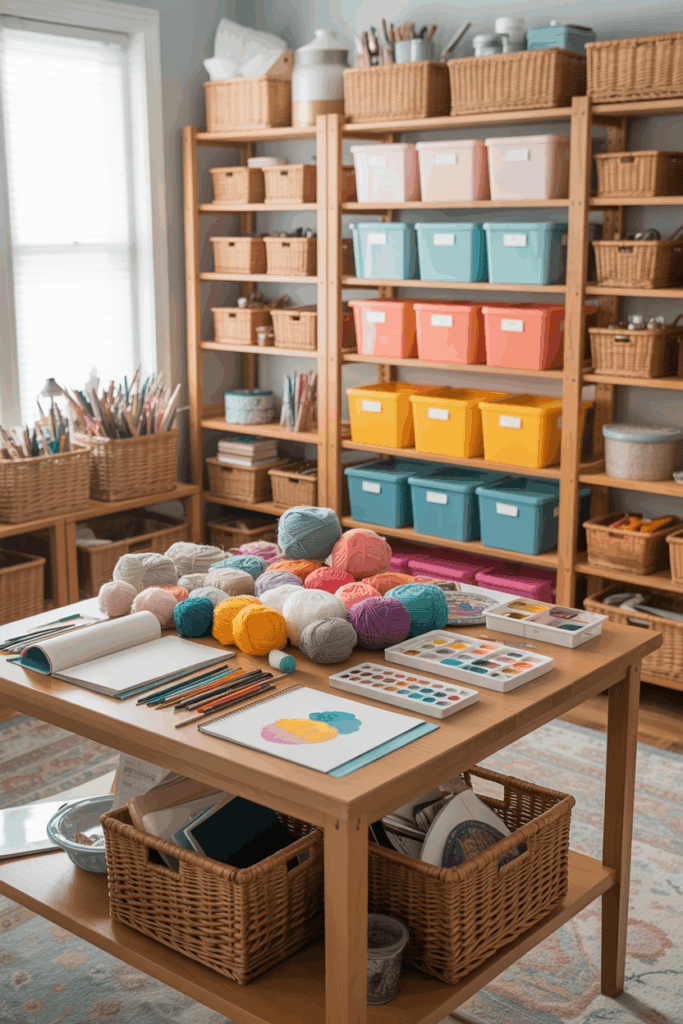
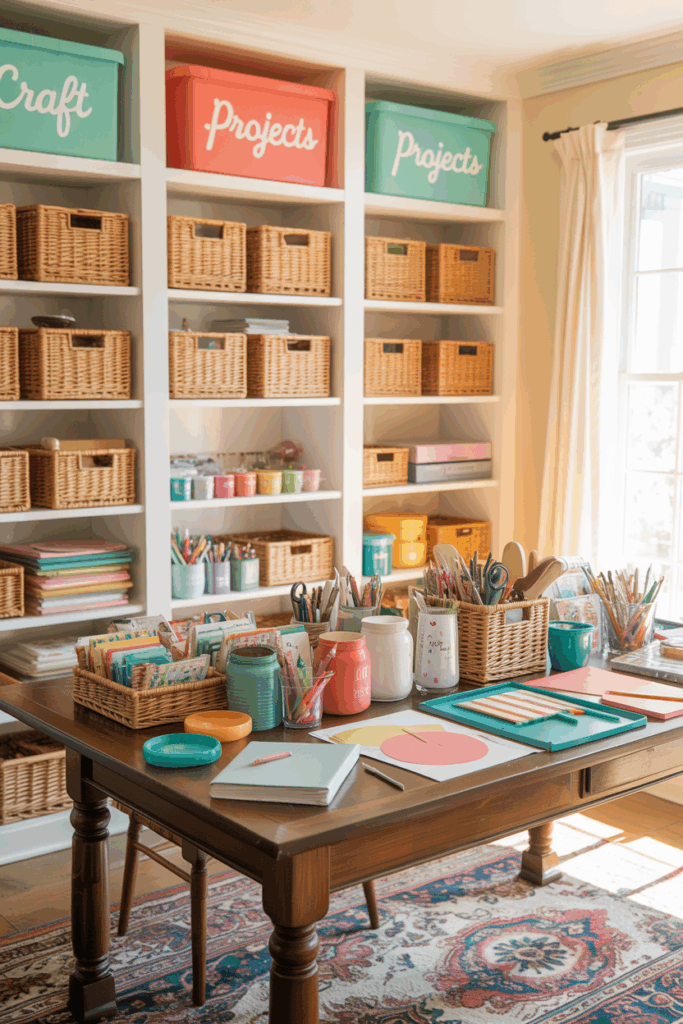
Incorporating a Crafting Table
A crafting table is a key element in any creative space. It serves as the heart of your projects, providing a dedicated area to bring your ideas to life. In the image, you can see a beautifully organized room featuring a spacious table, perfect for various crafting activities.
The table is surrounded by neatly arranged shelves filled with supplies. This setup not only keeps everything within reach but also inspires creativity. With the right organization, you can easily find what you need, whether it’s paper, tools, or embellishments.
Notice the use of baskets and boxes on the shelves. These storage solutions help maintain a tidy environment. A clean workspace can boost your focus and make crafting more enjoyable. Plus, it’s easier to clean up when everything has its place.
Lighting is also important. The bright, natural light in the room enhances visibility, making it easier to work on detailed projects. Consider adding a lamp to your crafting table for those late-night sessions.
Incorporating a crafting table into your space is not just about functionality; it’s also about creating an inviting atmosphere. Make it a spot where you love to spend time, and your creativity will flourish.
Using a Tension Rod for Ribbon Storage
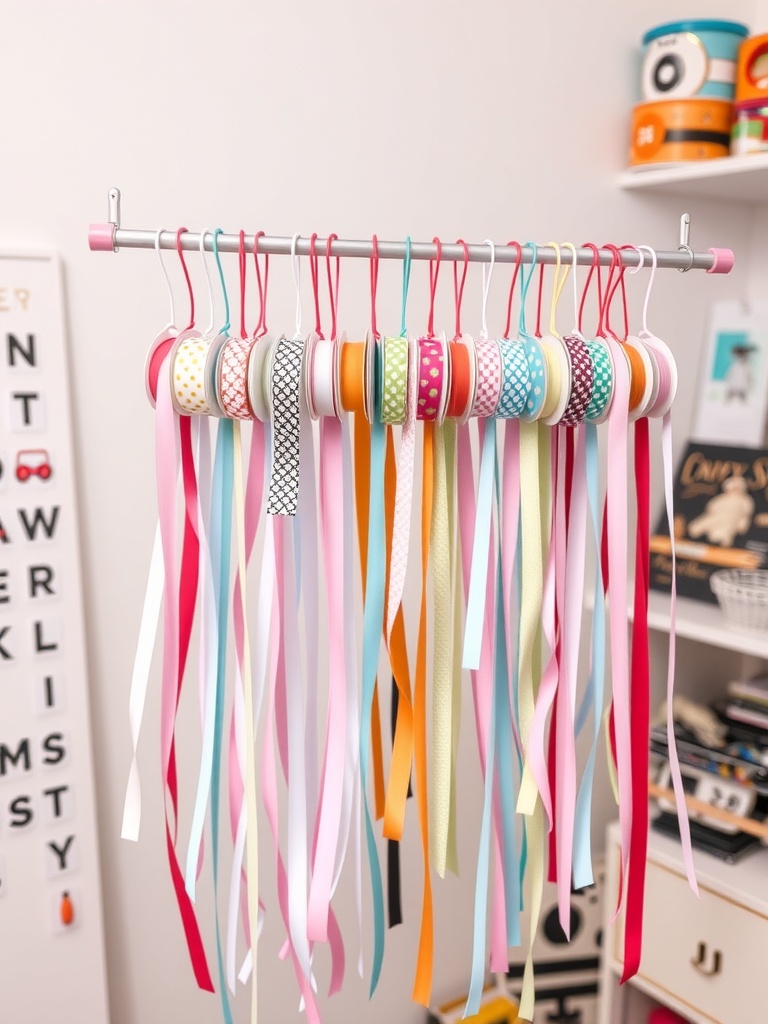
Storing ribbons can be tricky, but a tension rod makes it easy and fun. In the image, you can see a colorful display of ribbons neatly organized on a tension rod. This setup not only keeps your ribbons visible but also adds a splash of color to your craft room.
The tension rod is simple to install. Just find a spot between two walls or inside a cabinet. Slide the ribbons onto the rod using clips or hooks. This way, you can quickly grab the ribbon you need without rummaging through boxes.
Using a tension rod helps prevent tangling. Each ribbon hangs freely, making it easy to see what you have. Plus, it’s a great way to showcase your collection. You can mix and match colors to create a vibrant look that inspires creativity.
Overall, this method is practical and stylish. It keeps your workspace organized while allowing you to enjoy your beautiful ribbons every day.
Creating a Mood Board Area
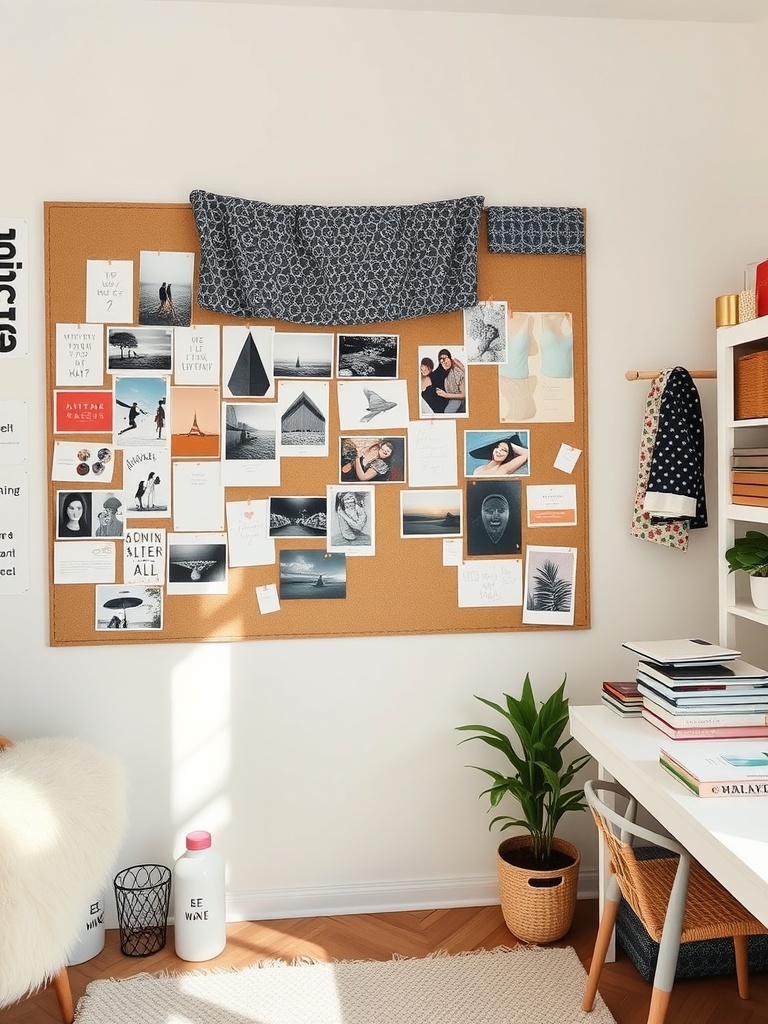
A mood board area is a fantastic way to spark creativity in your craft room. Imagine a space where you can pin up images, quotes, and inspirations that resonate with your projects. The image shows a cozy setup with a corkboard filled with various pictures and notes, all neatly arranged to inspire.
This board is not just functional; it adds a personal touch to your space. You can use it to display photos of past projects, color palettes, or even snippets of fabric that catch your eye. The soft fabric at the top adds a nice decorative element, making the board feel inviting.
Having a dedicated mood board area helps keep your ideas organized. You can easily swap out images as your inspiration evolves. Plus, it serves as a visual reminder of your creative goals. Surrounding yourself with things that inspire you can make a big difference in your crafting journey.
Using Magnetic Strips for Tools
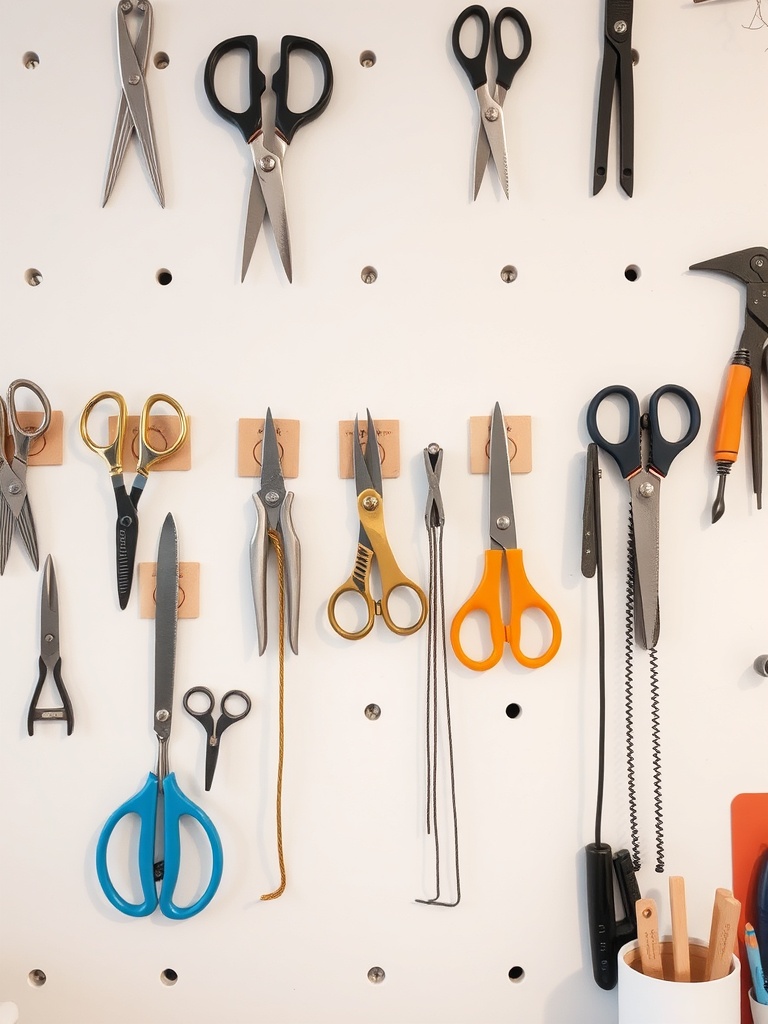
Magnetic strips are a fantastic way to keep your tools organized and easily accessible. In the image, you can see a wall adorned with various scissors and tools, all neatly arranged on a magnetic strip. This method not only saves space but also adds a touch of style to your craft room.
Using magnetic strips allows you to display your tools in a way that makes them easy to grab when you need them. No more digging through drawers or boxes! Each tool has its designated spot, making it simple to find exactly what you’re looking for.
To set up your magnetic strip, find a suitable location on your wall. Make sure it’s at a height that’s comfortable for you. Attach the strip securely, and then start placing your tools on it. You can mix and match different types of tools, like scissors, pliers, and other small items. This not only keeps everything organized but also adds a pop of color to your space.
Overall, using magnetic strips is a smart and stylish solution for keeping your tools organized. It’s a simple change that can make a big difference in how you work in your craft room.
Craft Supply Jars on Display
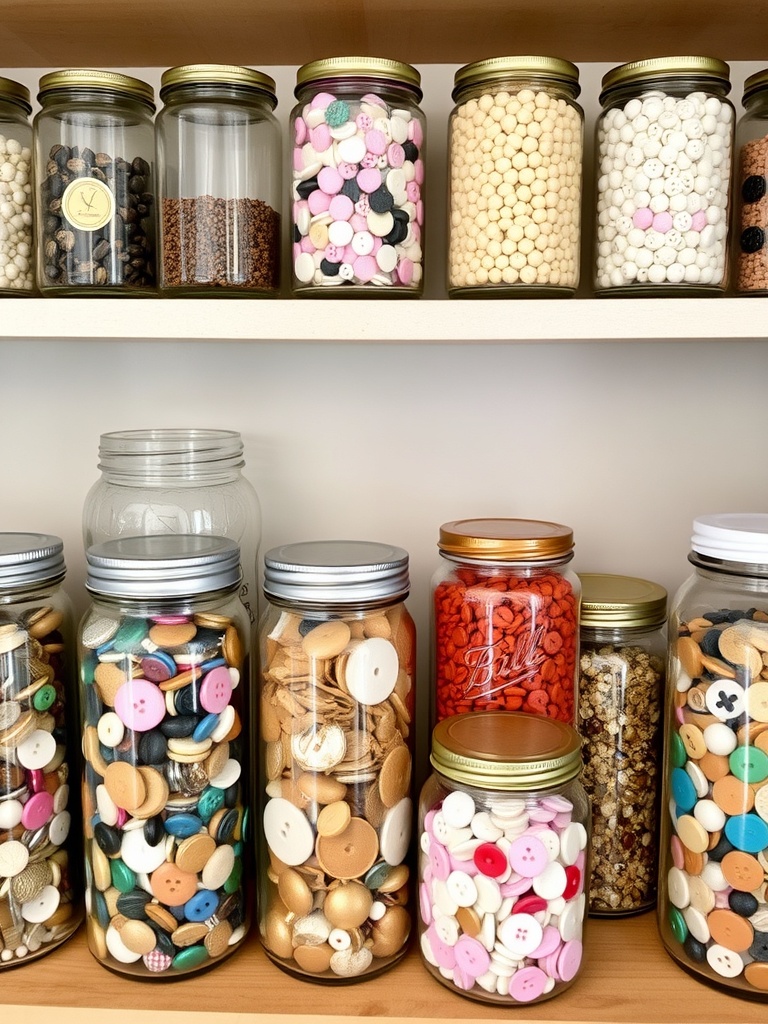
Displaying craft supplies in jars is a fun and practical way to keep your workspace organized. The image shows a neat row of jars, each filled with colorful buttons, beads, and other materials. This setup not only looks appealing but also makes it easy to find what you need.
Using clear jars allows you to see the contents at a glance. You can quickly grab the right color or size without rummaging through boxes. Plus, it adds a pop of color to your craft room, making it feel lively and inviting.
Labeling jars can also help keep everything in order. You can use simple tags or even a label maker for a polished look. This way, you’ll know exactly where to find your supplies, saving time and reducing frustration.
Consider mixing different types of materials in your jars. For example, combine buttons of various sizes and colors, or mix beads with sequins. This not only maximizes space but also creates a visually interesting display. You might even inspire your next project just by looking at your organized supplies!
Wall-Mounted Folding Tables

Wall-mounted folding tables are a fantastic addition to any craft room. They save space and provide a convenient work surface when you need it. This image shows a sleek folding table attached to the wall, ready for use. When you’re done, simply fold it away to keep your space tidy.
The design is simple yet functional. The table has a clean surface, perfect for laying out supplies or working on projects. The black backdrop enhances the overall look, making it a stylish choice for any room. You can easily personalize the area around it with shelves and organizers, as seen in the image.
Having a dedicated workspace like this can boost your creativity. You can set it up for various tasks, whether it’s painting, scrapbooking, or any other hobby. Plus, it’s easy to clean up when you’re finished!
Repurposing Furniture for Storage

Repurposing furniture can be a fun and practical way to organize your craft room. Take a look at this charming piece that combines storage and style. It features a wooden cabinet with open shelves and drawers, perfect for keeping supplies tidy.
The top section showcases baskets and containers, ideal for holding markers, scissors, and other small tools. This setup not only keeps everything accessible but also adds a touch of warmth to the space. The drawers below provide ample room for larger items, like rolls of paper or fabric.
Using furniture you already have can save money and create a unique look. Consider giving an old dresser a fresh coat of paint or adding some new knobs to match your decor. This approach not only declutters your space but also allows you to express your creativity.
Using Under-Bed Storage for Supplies

Under-bed storage is a fantastic way to keep your craft supplies organized and out of sight. In the image, you can see several gray storage bins neatly tucked away under a bed. These bins are perfect for holding everything from scissors and glue to colorful papers and markers.
Using this space not only maximizes your room but also keeps your supplies easily accessible. You can label each bin to make finding what you need a breeze. This method is especially useful if you have limited space in your craft room.
When choosing bins, look for ones that fit snugly under your bed. Clear bins can help you see what’s inside without having to pull them out. This simple organization hack can transform your crafting experience, making it more enjoyable and less cluttered.
Incorporating a Corkboard for Inspiration
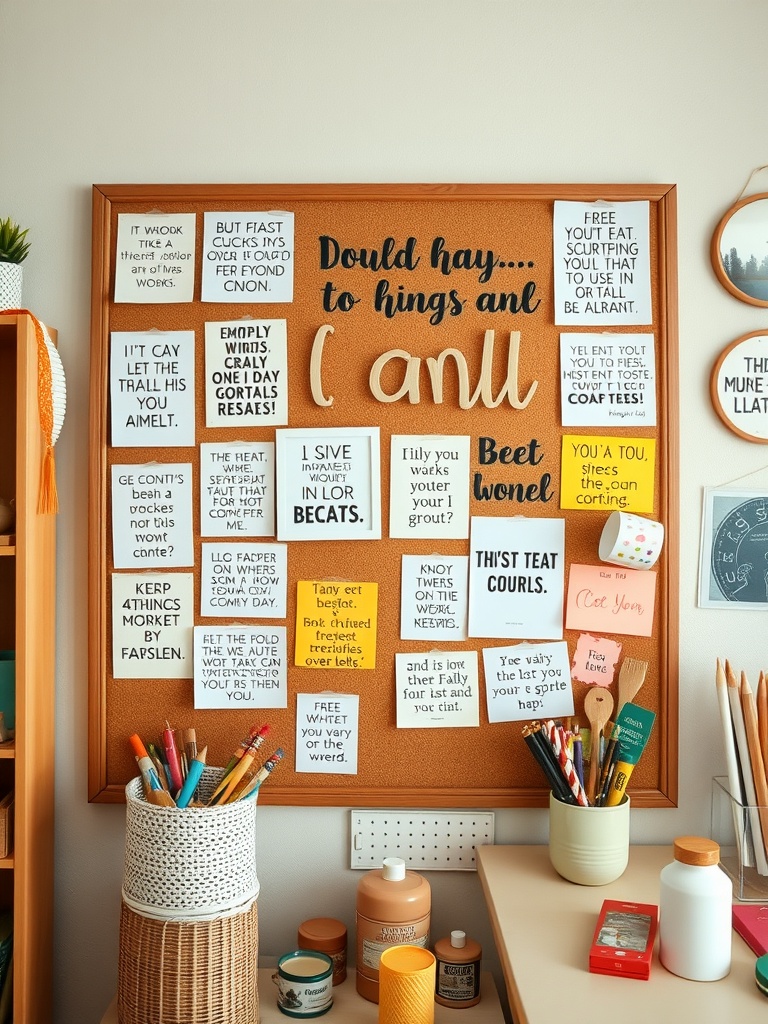
A corkboard can be a fantastic addition to your craft room. It serves as a canvas for your creativity, allowing you to pin up ideas, reminders, and inspiration. The image shows a vibrant corkboard filled with colorful notes and quotes that spark joy and motivation.
Using a corkboard lets you display your favorite sayings or project ideas. You can easily change them out as your inspiration evolves. This keeps your space fresh and engaging. The mix of colors and fonts in the notes adds a playful touch, making the board a focal point in the room.
Organizing your thoughts visually can help you stay focused on your projects. You can pin up fabric swatches, sketches, or even photos of completed works. This not only keeps your ideas in sight but also encourages you to keep creating.
Consider placing your corkboard at eye level, so it’s easy to see and interact with. Surrounding it with your crafting supplies can create a cozy nook that invites you to spend time working on your projects. A corkboard is more than just a tool; it’s a source of inspiration that can transform your workspace.
Using Suitcases for Vintage Storage
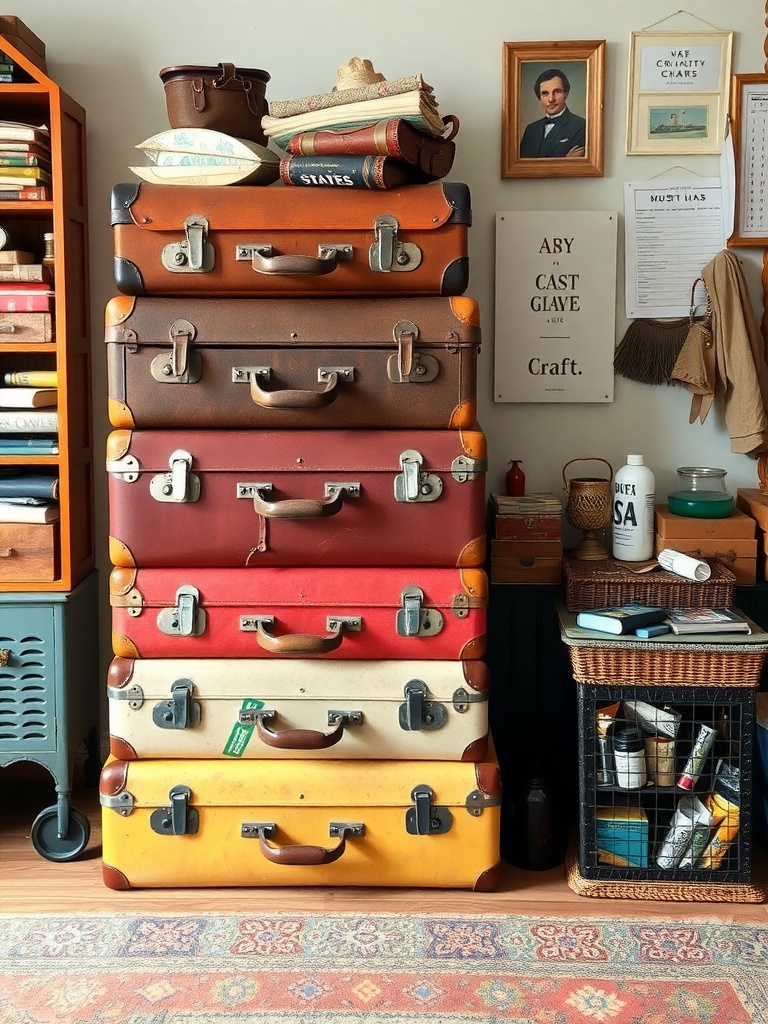
Using vintage suitcases for storage is a charming way to organize your craft room. These suitcases not only add character but also serve as practical storage solutions. Stacking them creates a unique display that draws the eye and keeps your supplies neatly tucked away.
The image shows a colorful stack of suitcases, each with its own history. The warm tones of brown, red, and yellow create a cozy vibe. You can use these suitcases to store everything from fabric to tools, making it easy to find what you need when inspiration strikes.
Consider labeling each suitcase for quick access. This way, you can keep similar items together, like yarn in one and paints in another. The added benefit is that they can double as decorative pieces, giving your craft room a vintage flair.
Creating a Craft Supply Inventory
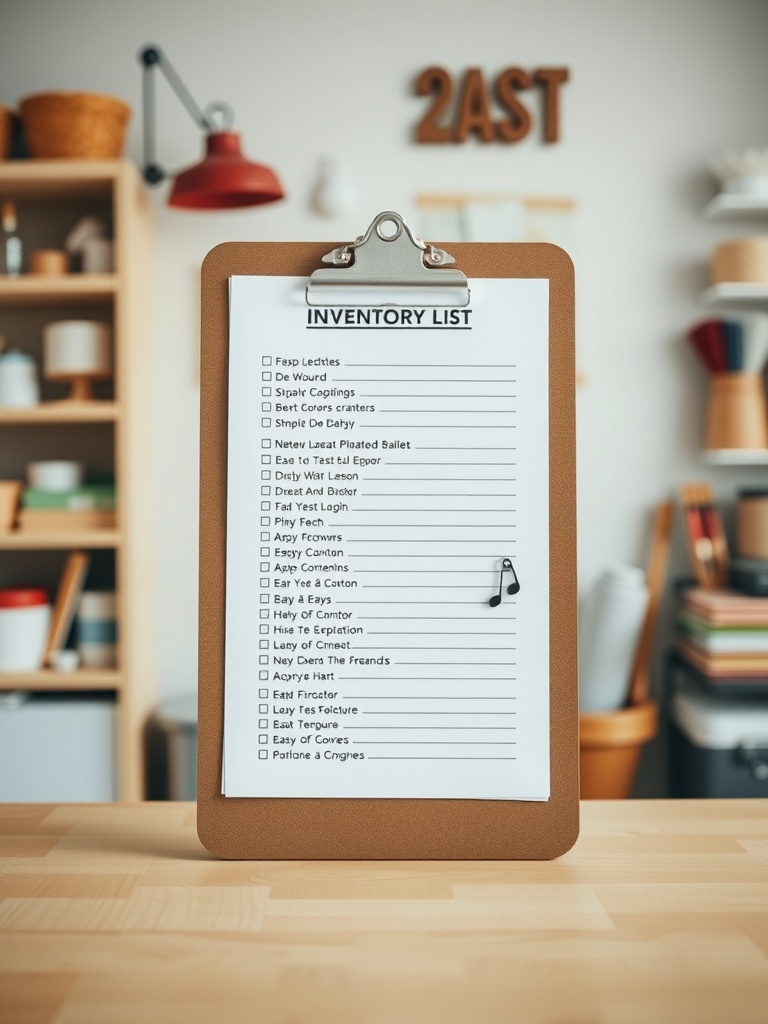
Keeping track of your craft supplies can make a world of difference in your creative space. The image shows a clipboard with an inventory list, ready to help you organize your materials. This simple tool can help you see what you have and what you might need.
Start by listing all your supplies. You can include items like papers, paints, and tools. Check off what you already own. This way, you won’t buy duplicates and can easily find what you need when inspiration strikes.
Don’t forget to categorize your supplies. Group similar items together, like all your paints in one section and papers in another. This makes it easier to locate things quickly. You can even add notes about where you store each item.
Updating your inventory regularly is key. Whenever you use something up or buy new supplies, make a note. This keeps your list current and helps you plan future shopping trips.
Creating a Folding Chair Area
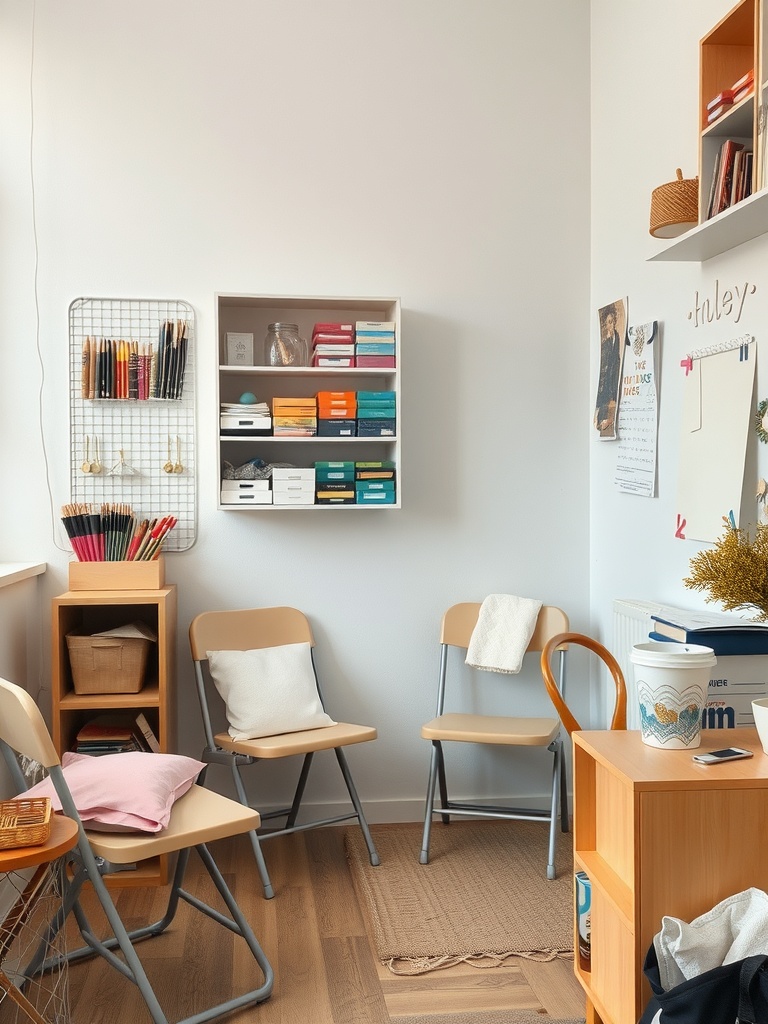
Setting up a folding chair area in your craft room can make a big difference. It creates a cozy spot for you and your friends to gather and work on projects together. The image shows a neat arrangement of folding chairs, which are perfect for saving space when not in use.
These chairs can easily be moved around, allowing for flexibility in your workspace. You can pull them out when you need extra seating or tuck them away to keep the area open. Adding cushions or throws can make them more comfortable and inviting.
Consider placing a small table nearby for snacks or drinks. This way, you can enjoy some refreshments while you craft. The shelving units in the image also help keep your supplies organized, making it easy to grab what you need without cluttering the space.
Designating a Scrap Paper Bin

Having a designated scrap paper bin can make a big difference in your craft room. It’s a simple solution that helps keep your workspace tidy while also making sure you don’t waste materials. The image shows a colorful bin filled with various scraps of paper, which adds a fun touch to the room.
This bin is perfect for collecting leftover pieces from your projects. Instead of tossing them in the trash, you can save them for future use. You never know when a small scrap might come in handy for a new idea!
Make sure your bin is easily accessible. Place it near your main crafting area so you can quickly toss in scraps without interrupting your flow. You can even label the bin to make it clear that it’s for scrap paper. This helps everyone in the household know where to put their leftover materials.
Consider using a bin that matches your room’s decor. A stylish container can enhance the overall look of your craft space while keeping it organized. Plus, a colorful bin like the one in the image can inspire creativity every time you see it!
Incorporating a Sewing Station
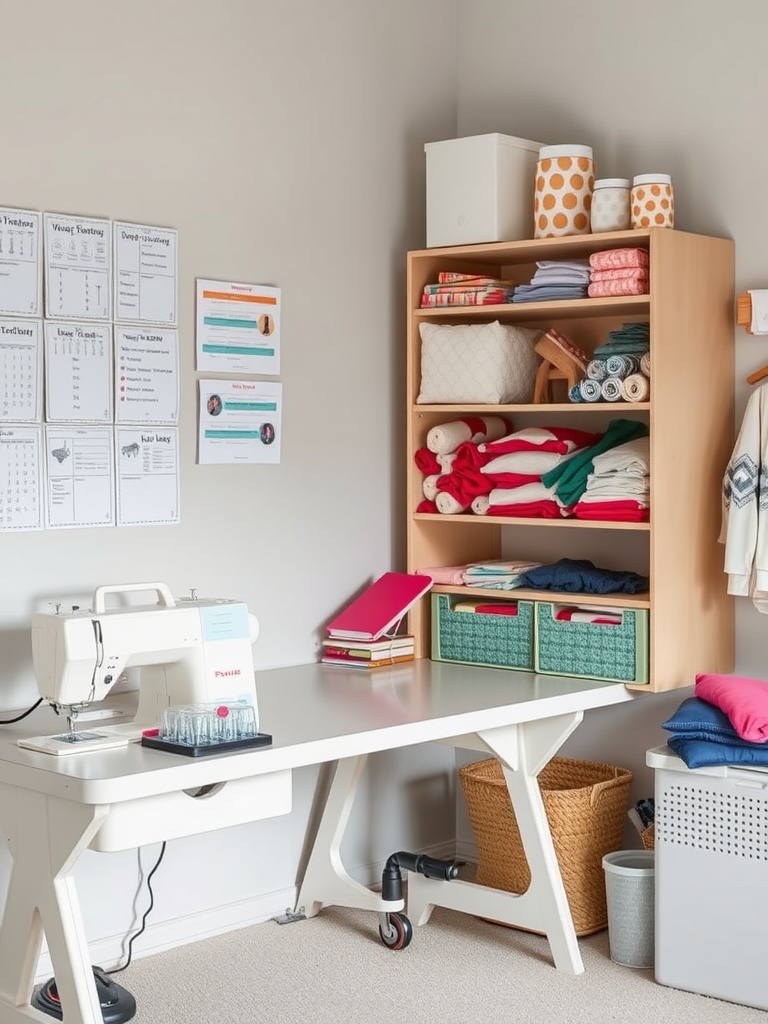
Creating a dedicated sewing station can make your crafting experience much more enjoyable. In the image, you can see a well-organized space that highlights the essentials for sewing. A sewing machine sits prominently on a clean, spacious table, ready for action.
The shelving unit above is a great feature, showcasing neatly folded fabrics and supplies. Colorful baskets help keep smaller items organized, making it easy to find what you need. This setup encourages creativity and keeps everything within reach.
Having a designated area for sewing not only boosts productivity but also adds a personal touch to your craft room. You can personalize the space with your favorite colors and materials, making it a place you love to spend time in.
Utilizing a Closet for Craft Storage

Using a closet for craft storage is a smart way to keep your supplies organized and accessible. The image shows a well-arranged closet filled with various storage solutions. You can see clear bins, baskets, and shelves that make it easy to find what you need.
Start by sorting your materials into categories. For example, keep paper, tools, and embellishments separate. This makes it easier to grab what you need without rummaging through everything. The clear bins in the image are perfect for this, allowing you to see what’s inside at a glance.
Labeling is another great tip. Use labels on bins and shelves to quickly identify contents. This saves time and keeps everything in its place. The closet in the image has a neat appearance, which can inspire you to create a similar setup.
Don’t forget about vertical space! Use shelves to store items you don’t use often. The closet shown utilizes its height well, maximizing storage without taking up floor space. This is especially useful for larger items that can be stored on higher shelves.
Finally, keep your workspace tidy by regularly decluttering. Set a routine to go through your supplies and remove anything you no longer need. A clean and organized closet will inspire your creativity and make crafting more enjoyable.
Incorporating a Lighted Display for Finished Projects
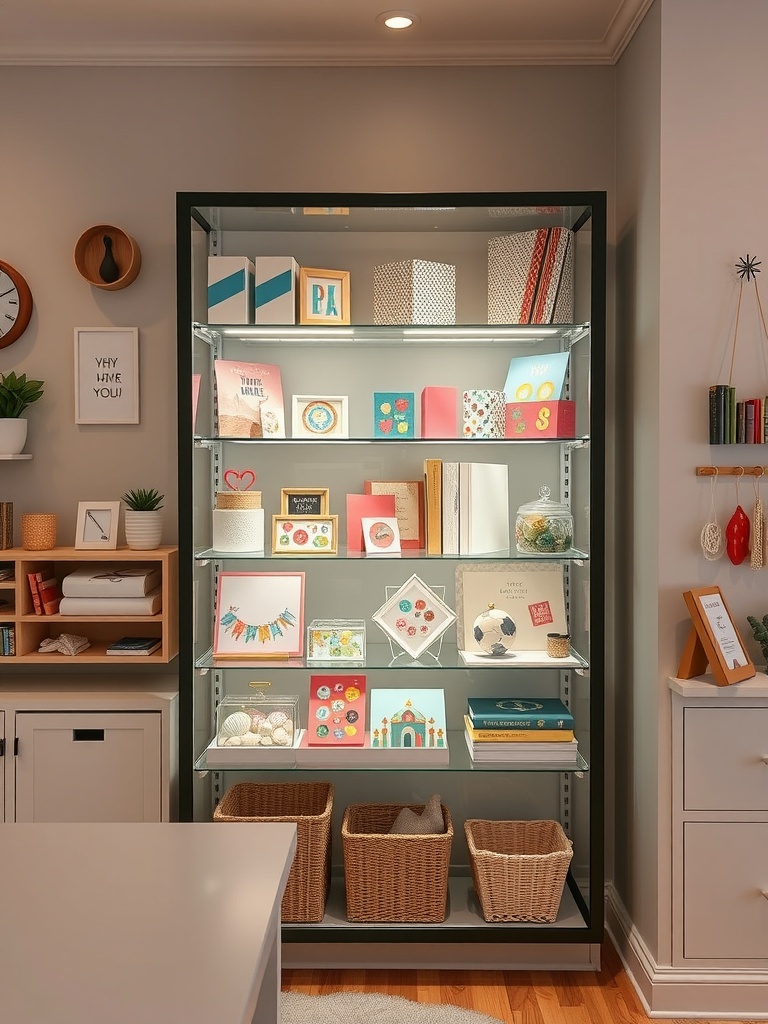
Creating a space to showcase your finished projects can be both fun and rewarding. A lighted display adds an extra touch, making your creations shine. The image shows a beautifully organized display case filled with colorful cards and projects, all neatly arranged and illuminated.
Using clear shelves allows for easy visibility of your work. The soft lighting highlights each piece, drawing attention to the details. This setup not only keeps your projects safe but also turns them into a decorative element in your craft room.
Consider using baskets or boxes on lower shelves for storage. This keeps the area tidy while still allowing your finished items to take center stage. A well-lit display can inspire creativity and make your space feel more inviting.
Using a File Organizer for Paper
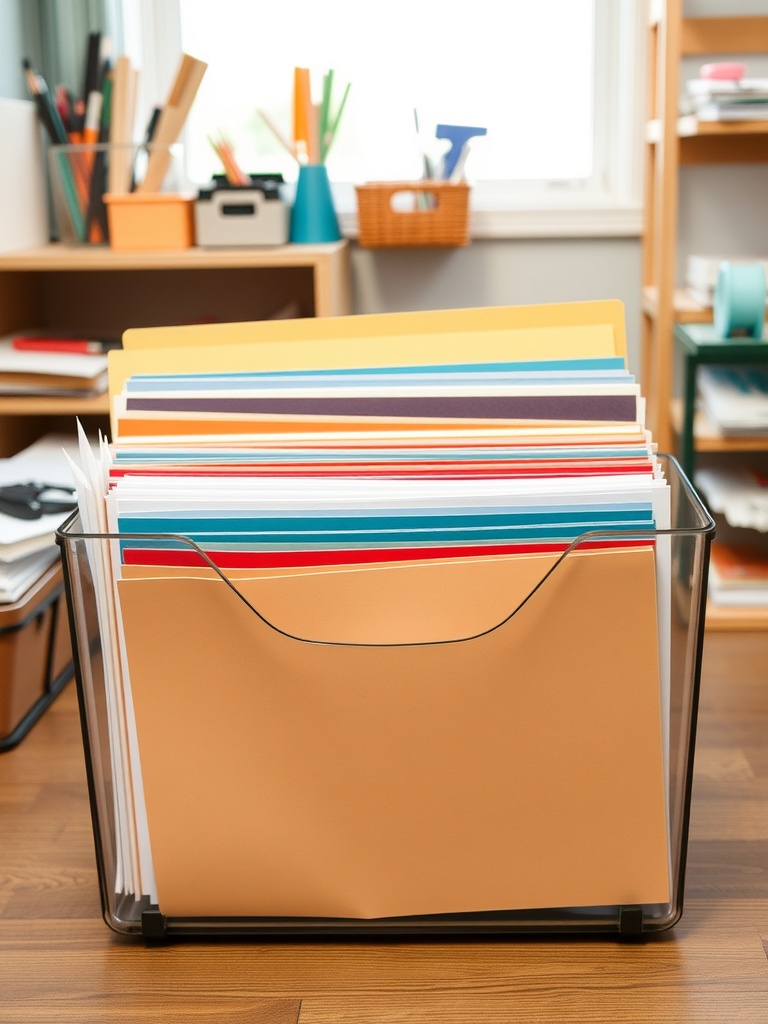
Keeping your craft room organized can feel like a challenge, especially when it comes to managing all that paper. A file organizer is a simple yet effective solution to keep everything in its place. In the image, you can see a clear file organizer filled with colorful sheets of paper. This setup not only looks neat but also makes it easy to find what you need.
Using a file organizer helps you categorize your paper by color, type, or project. This way, you can grab the right sheet without rummaging through piles. It’s a great way to keep your workspace tidy and functional. Plus, having everything visible encourages creativity and makes it easier to plan your next project.
Consider labeling each section of your file organizer. This small step can save you time and frustration when you’re in the middle of crafting. With everything organized, you’ll spend less time searching and more time creating.
Creating a Crafting Calendar
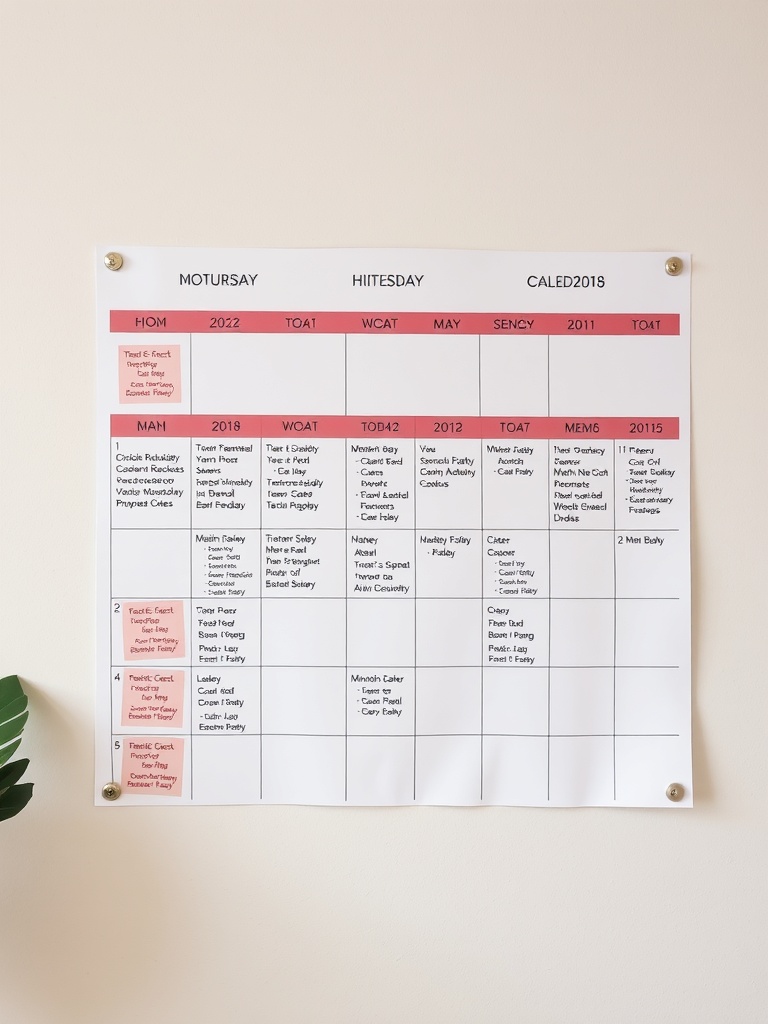
A crafting calendar is a fantastic way to stay organized and keep track of your projects. The image shows a well-structured calendar that can help you plan your crafting activities throughout the year. Each month is laid out clearly, making it easy to see what you have scheduled.
Using a calendar like this allows you to jot down important dates for crafting events, deadlines for projects, or even reminders for when to restock supplies. You can personalize it with colors or stickers to make it more fun and engaging.
Having a visual representation of your crafting schedule can boost your motivation. It’s satisfying to see your plans laid out, and it helps you manage your time better. You can plan ahead for seasonal projects or special occasions, ensuring you’re always prepared.
Consider placing your calendar in a spot where you’ll see it often. This way, you’ll be reminded of your upcoming projects and can adjust your plans as needed. A crafting calendar can truly enhance your creative experience!
Incorporating a Dry Erase Board for Ideas
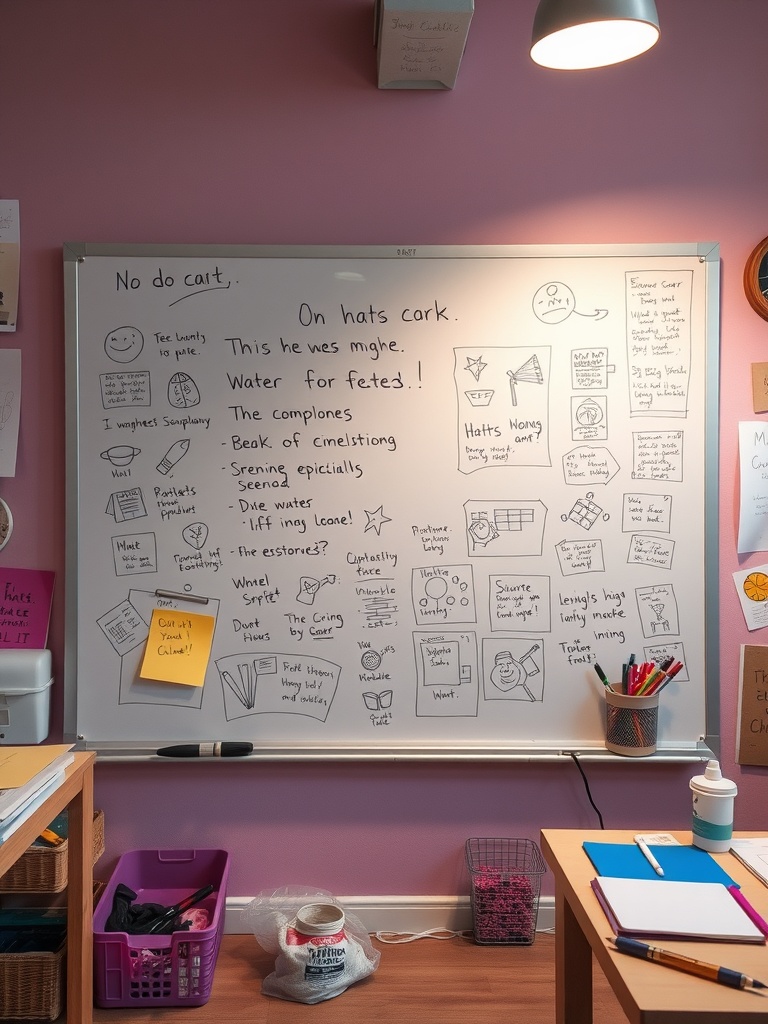
A dry erase board can be a fantastic addition to your craft room. It serves as a blank canvas for all your creative thoughts and ideas. In the image, you can see a board filled with sketches, notes, and reminders. This visual clutter can actually help you organize your thoughts and keep track of ongoing projects.
Using a dry erase board allows for easy updates. You can jot down new ideas as they come to you, or erase and change things around without any mess. This flexibility is perfect for those moments when inspiration strikes. The colorful markers add a fun touch, making it a lively part of your workspace.
Consider dedicating a section of the board for brainstorming. You can write down themes for future projects or even create a list of supplies you need. This way, everything stays in one place, and you won’t forget those brilliant ideas when you’re ready to start creating.
Using Hooks for Apron and Tool Storage
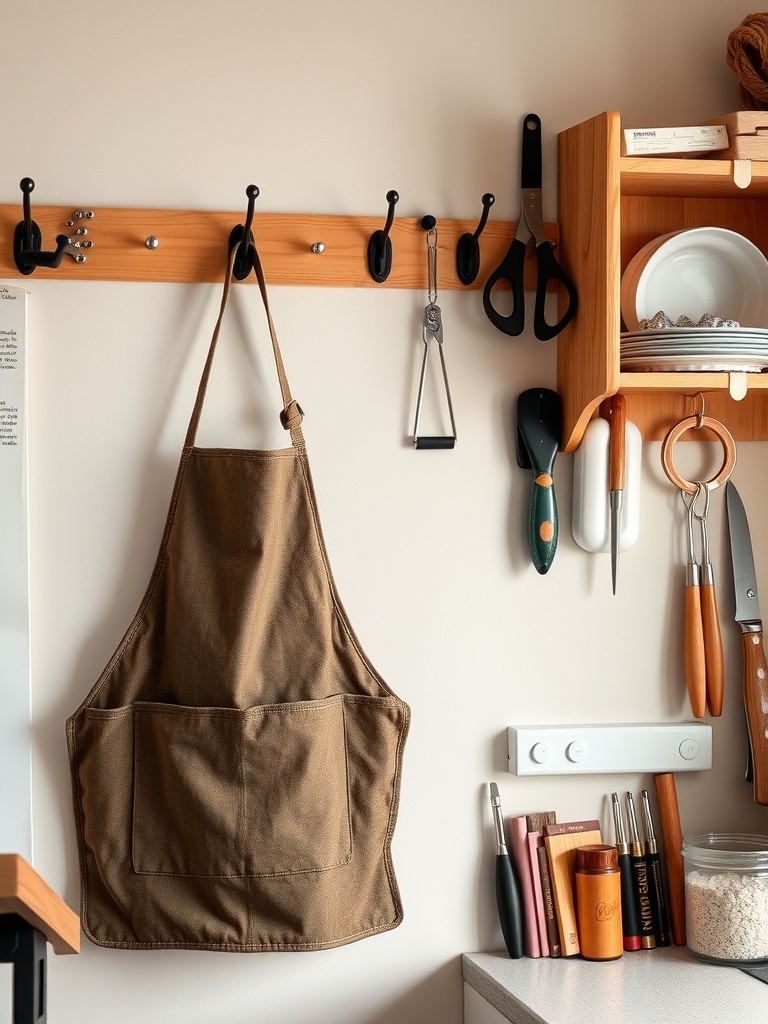
Using hooks in your craft room is a simple yet effective way to keep your space organized. The image shows a well-arranged wall with hooks that hold an apron and various tools. This setup not only saves space but also makes it easy to grab what you need when inspiration strikes.
The brown apron hanging on the hooks is a practical choice. It’s within reach, ready for any project. Surrounding it are tools like scissors and a spatula, all neatly displayed. This kind of organization helps you see everything at a glance, reducing clutter on your work surface.
Hooks can be installed in various places, making them versatile for any craft room. You can use them for aprons, scissors, or even small baskets for additional storage. This method keeps your essentials visible and accessible, making your crafting experience smoother and more enjoyable.
Creating a Seasonal Craft Display
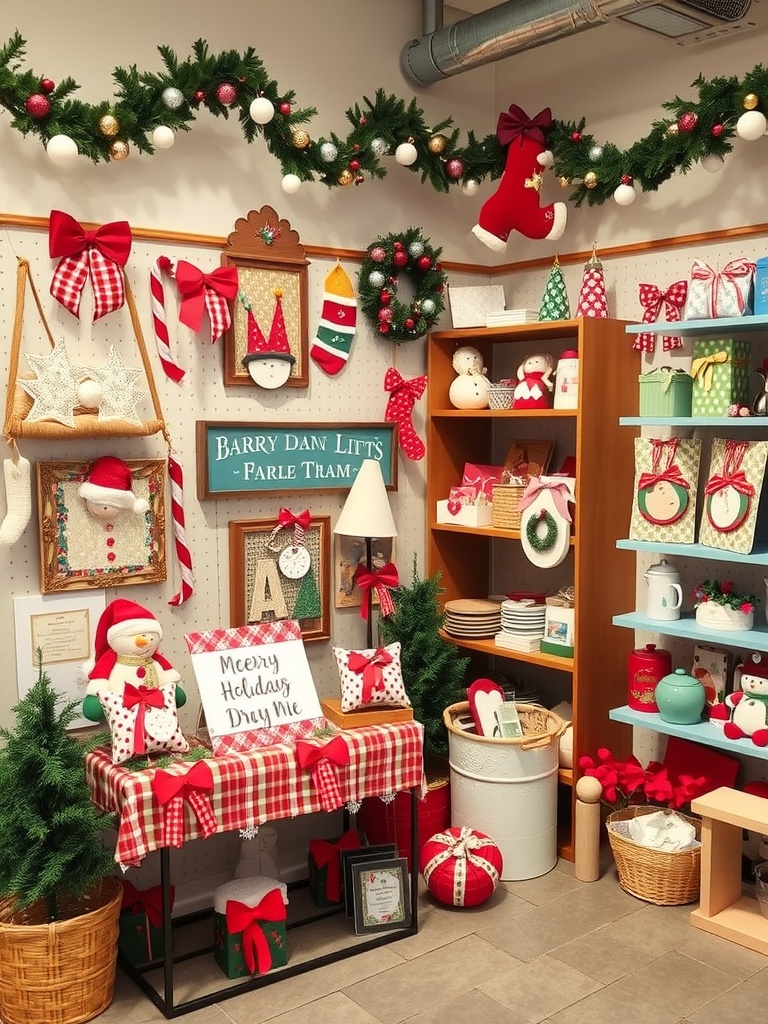
Seasonal displays can bring a fresh vibe to your craft room. This image showcases a delightful holiday-themed setup that is both charming and organized. The use of festive colors and decorations instantly creates a joyful atmosphere.
Notice the cheerful snowman and the vibrant red bows that add a pop of color. The arrangement of items on the table, including a sign that reads ‘Merry Holidays Dry Me,’ invites creativity and seasonal cheer. This display not only serves as decoration but also as inspiration for upcoming projects.
Utilizing shelves effectively, the display features a variety of craft supplies and holiday decor. The mix of textures, from the soft pillows to the shiny ornaments, adds depth to the overall look. Incorporating greenery and festive elements makes it feel welcoming and fun.
Creating a seasonal craft display like this can motivate you to start new projects. It’s a fantastic way to showcase your favorite supplies while celebrating the season. So, gather your materials and let your creativity shine!
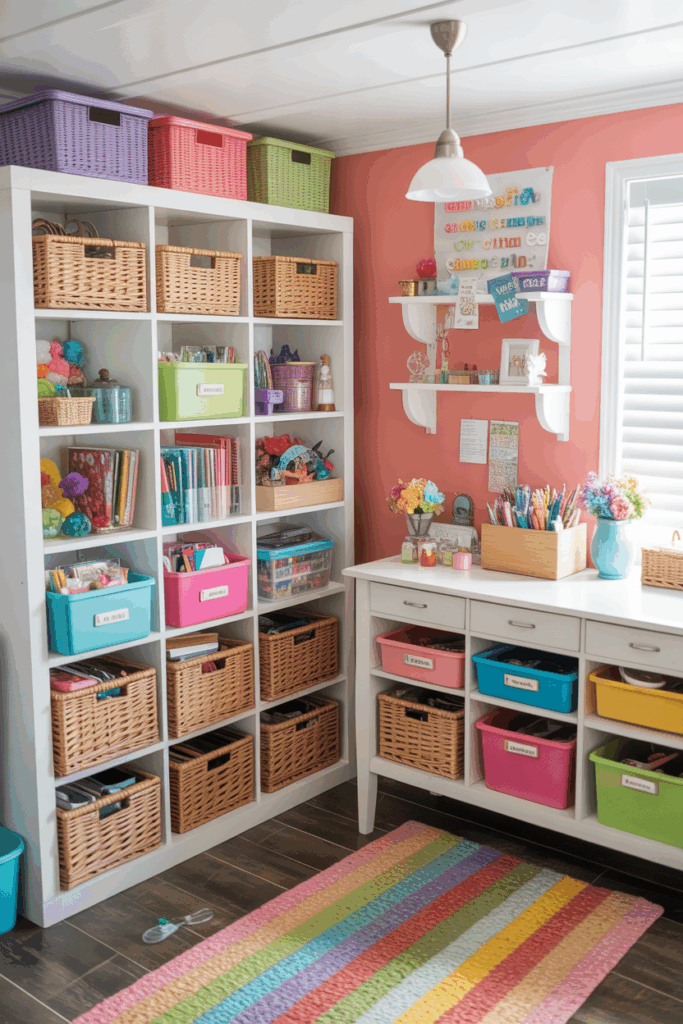
Designing a Kid-Friendly Craft Area
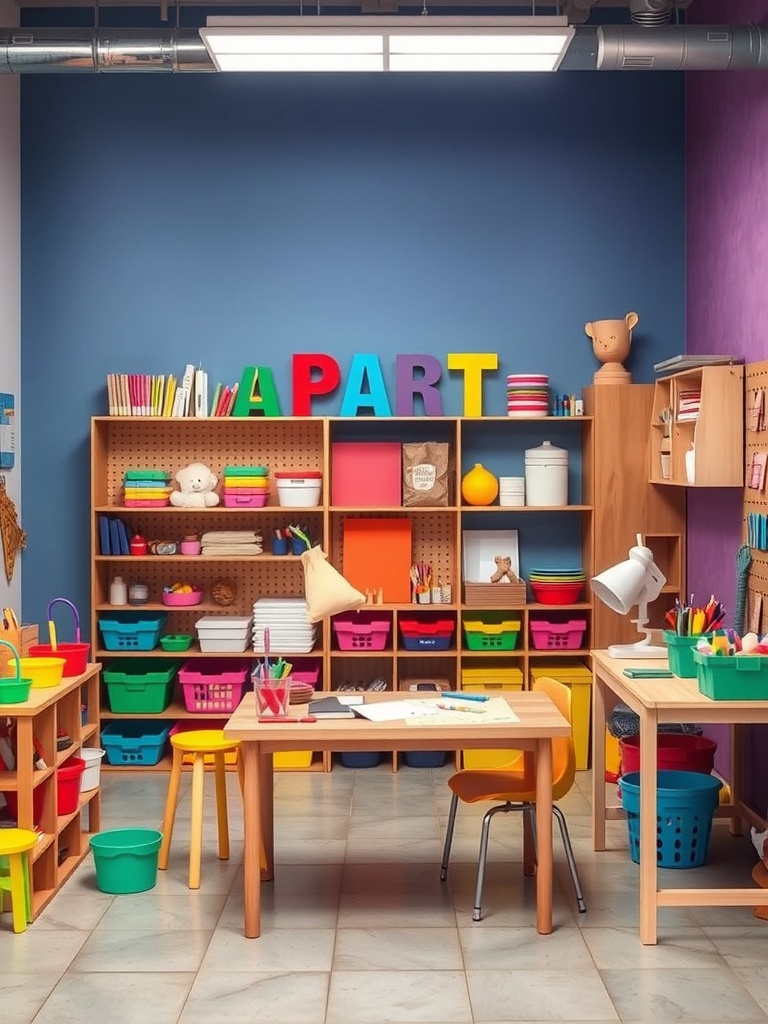
Creating a kid-friendly craft area can be a fun and rewarding project. The image shows a vibrant space filled with colorful storage bins and cheerful decorations. This setup invites creativity and exploration.
The bright colors in the room, like the rainbow of baskets and the playful letters spelling ‘A PART,’ make it visually appealing for children. Each bin can hold different supplies, making it easy for kids to find what they need. This organization helps them learn to clean up after themselves, too!
Having a dedicated table for crafting is essential. It provides a space where kids can spread out their materials and work on projects comfortably. The two tables in the image are perfect for group activities or individual projects. A well-lit area, like the one shown, encourages kids to focus on their creations.
Adding personal touches, like stuffed animals or fun decorations, can make the space feel welcoming. This encourages kids to spend time there, exploring their artistic side. Overall, a well-organized craft area can inspire creativity and provide endless hours of fun